User Profile
The user profile page is where users can view and edit their personal information. Users can also view their past submissions, in-progresss submissions and the submission groups they have created. The user profile page is accessible by clicking on “Profile” on the navigation bar.

The Profile page has three tabs: “Account”, “Contact Information”, and “Language”.

Account Tab
In the Account tab, users can view and edit their personal information. This includes their name, email address and email notification preference, however, the email address field is read-only and cannot be changed from the Profile page. The “Receive notification emails?” checkbox allows users to control whether they want to receive email notifications for new submissions. By default, this checkbox is checked.
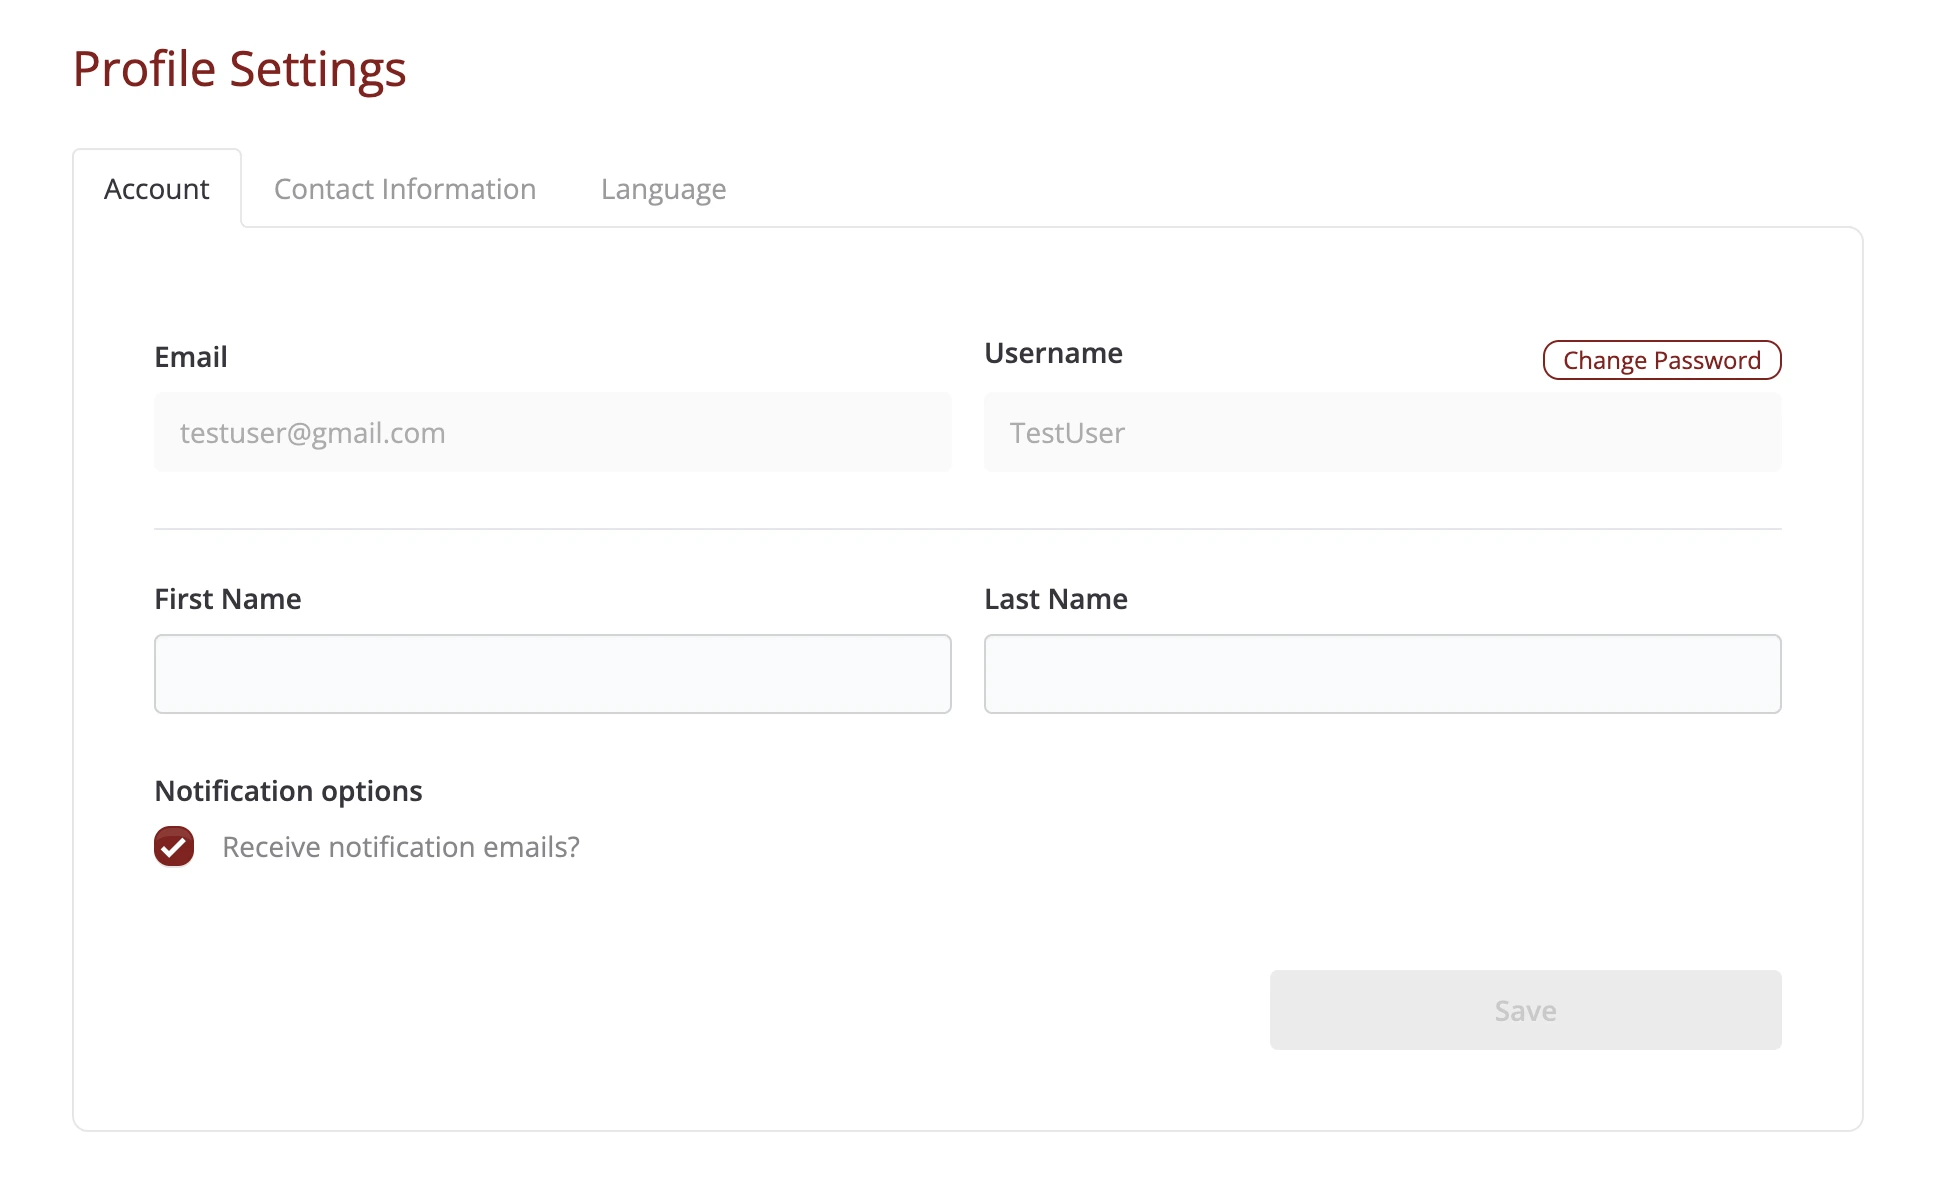
To save changes made to personal information, click on the “Save” button.
Users can also change their password here by clicking on the change password button towards the top right of the Account tab. This will lead them to a password change page.
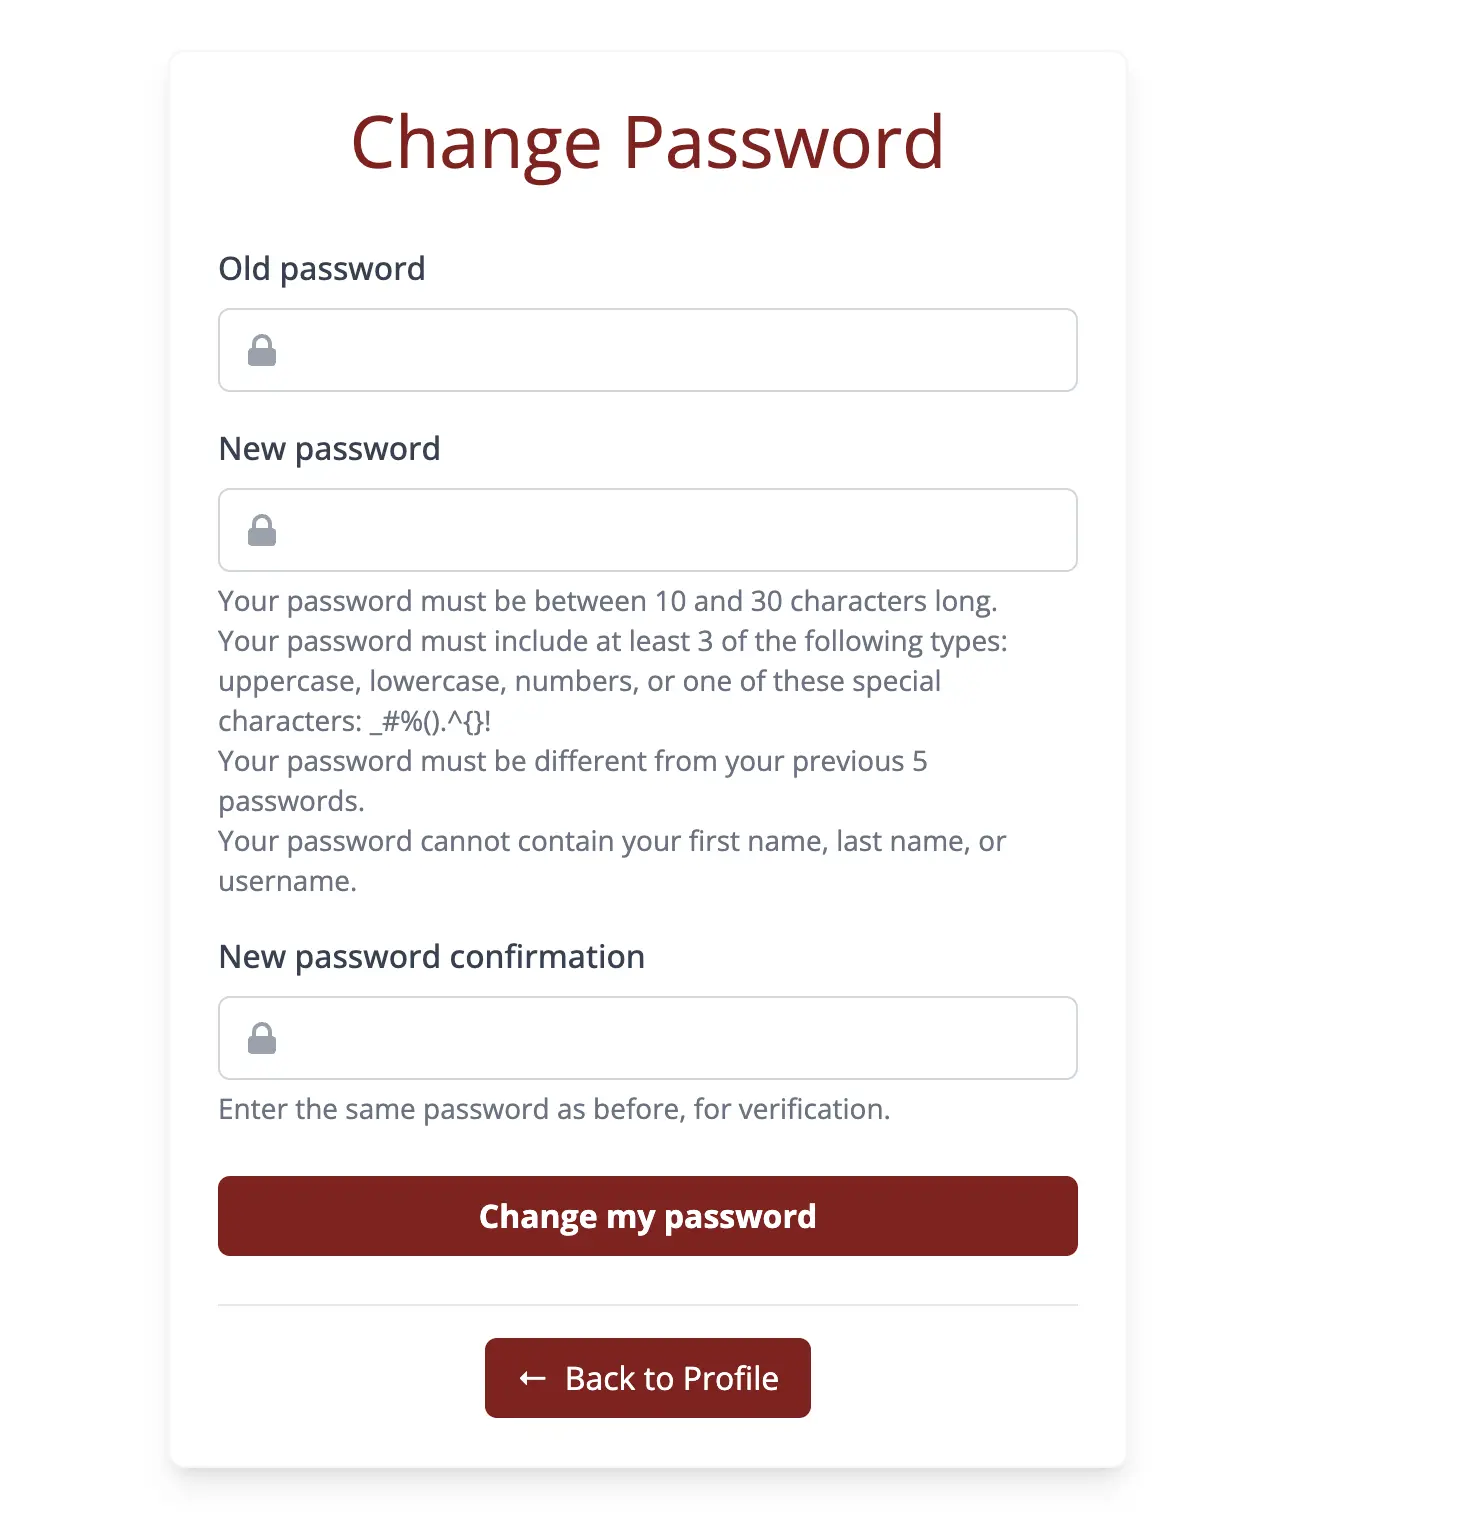
On this page, users can enter their old password and new password along with its confirmation to change their passwords.
Contact Information Tab
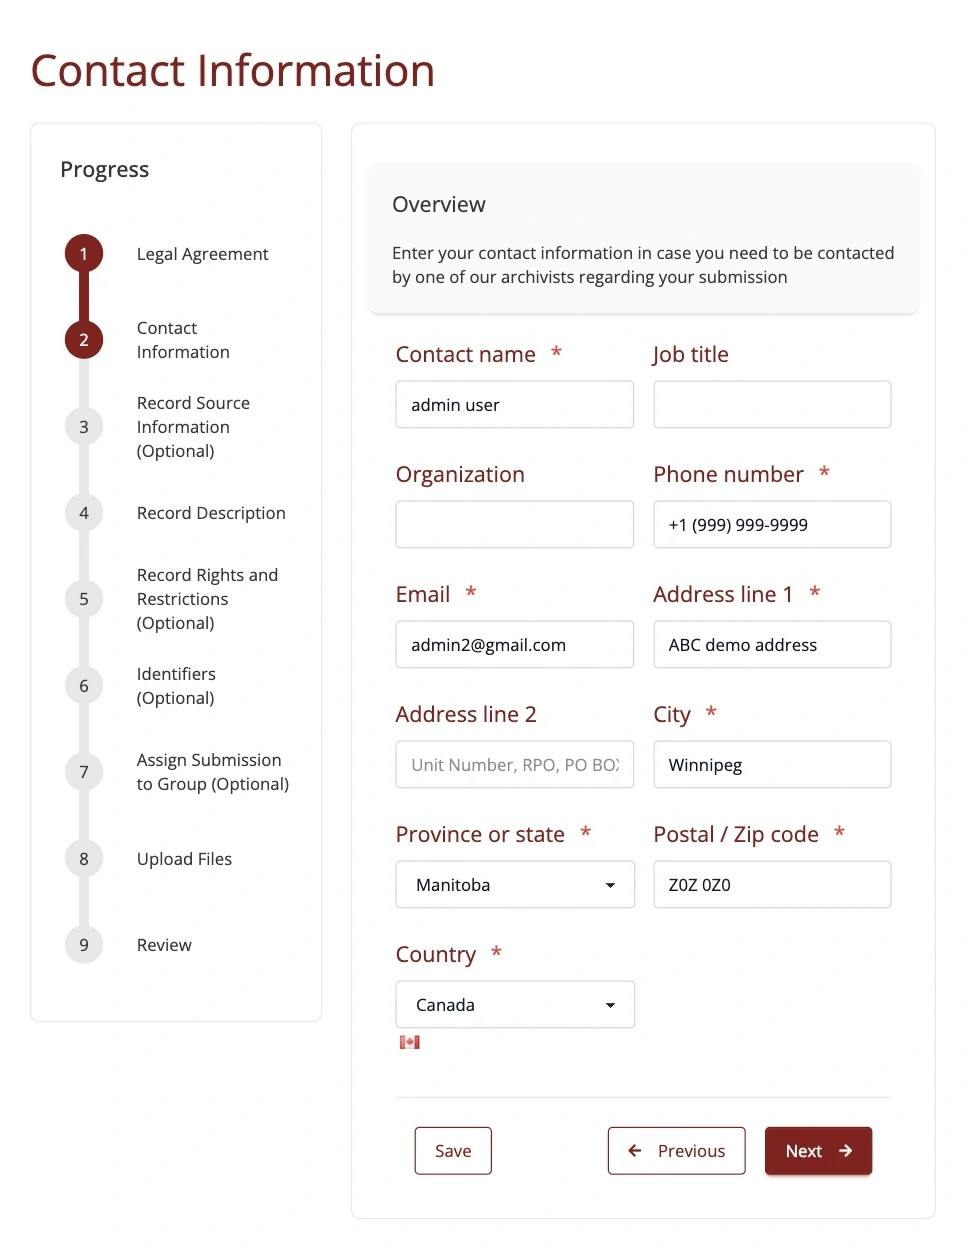
The Contact Information tab allows users to store their contact details including phone number and address. This information is stored in your profile for convenience.
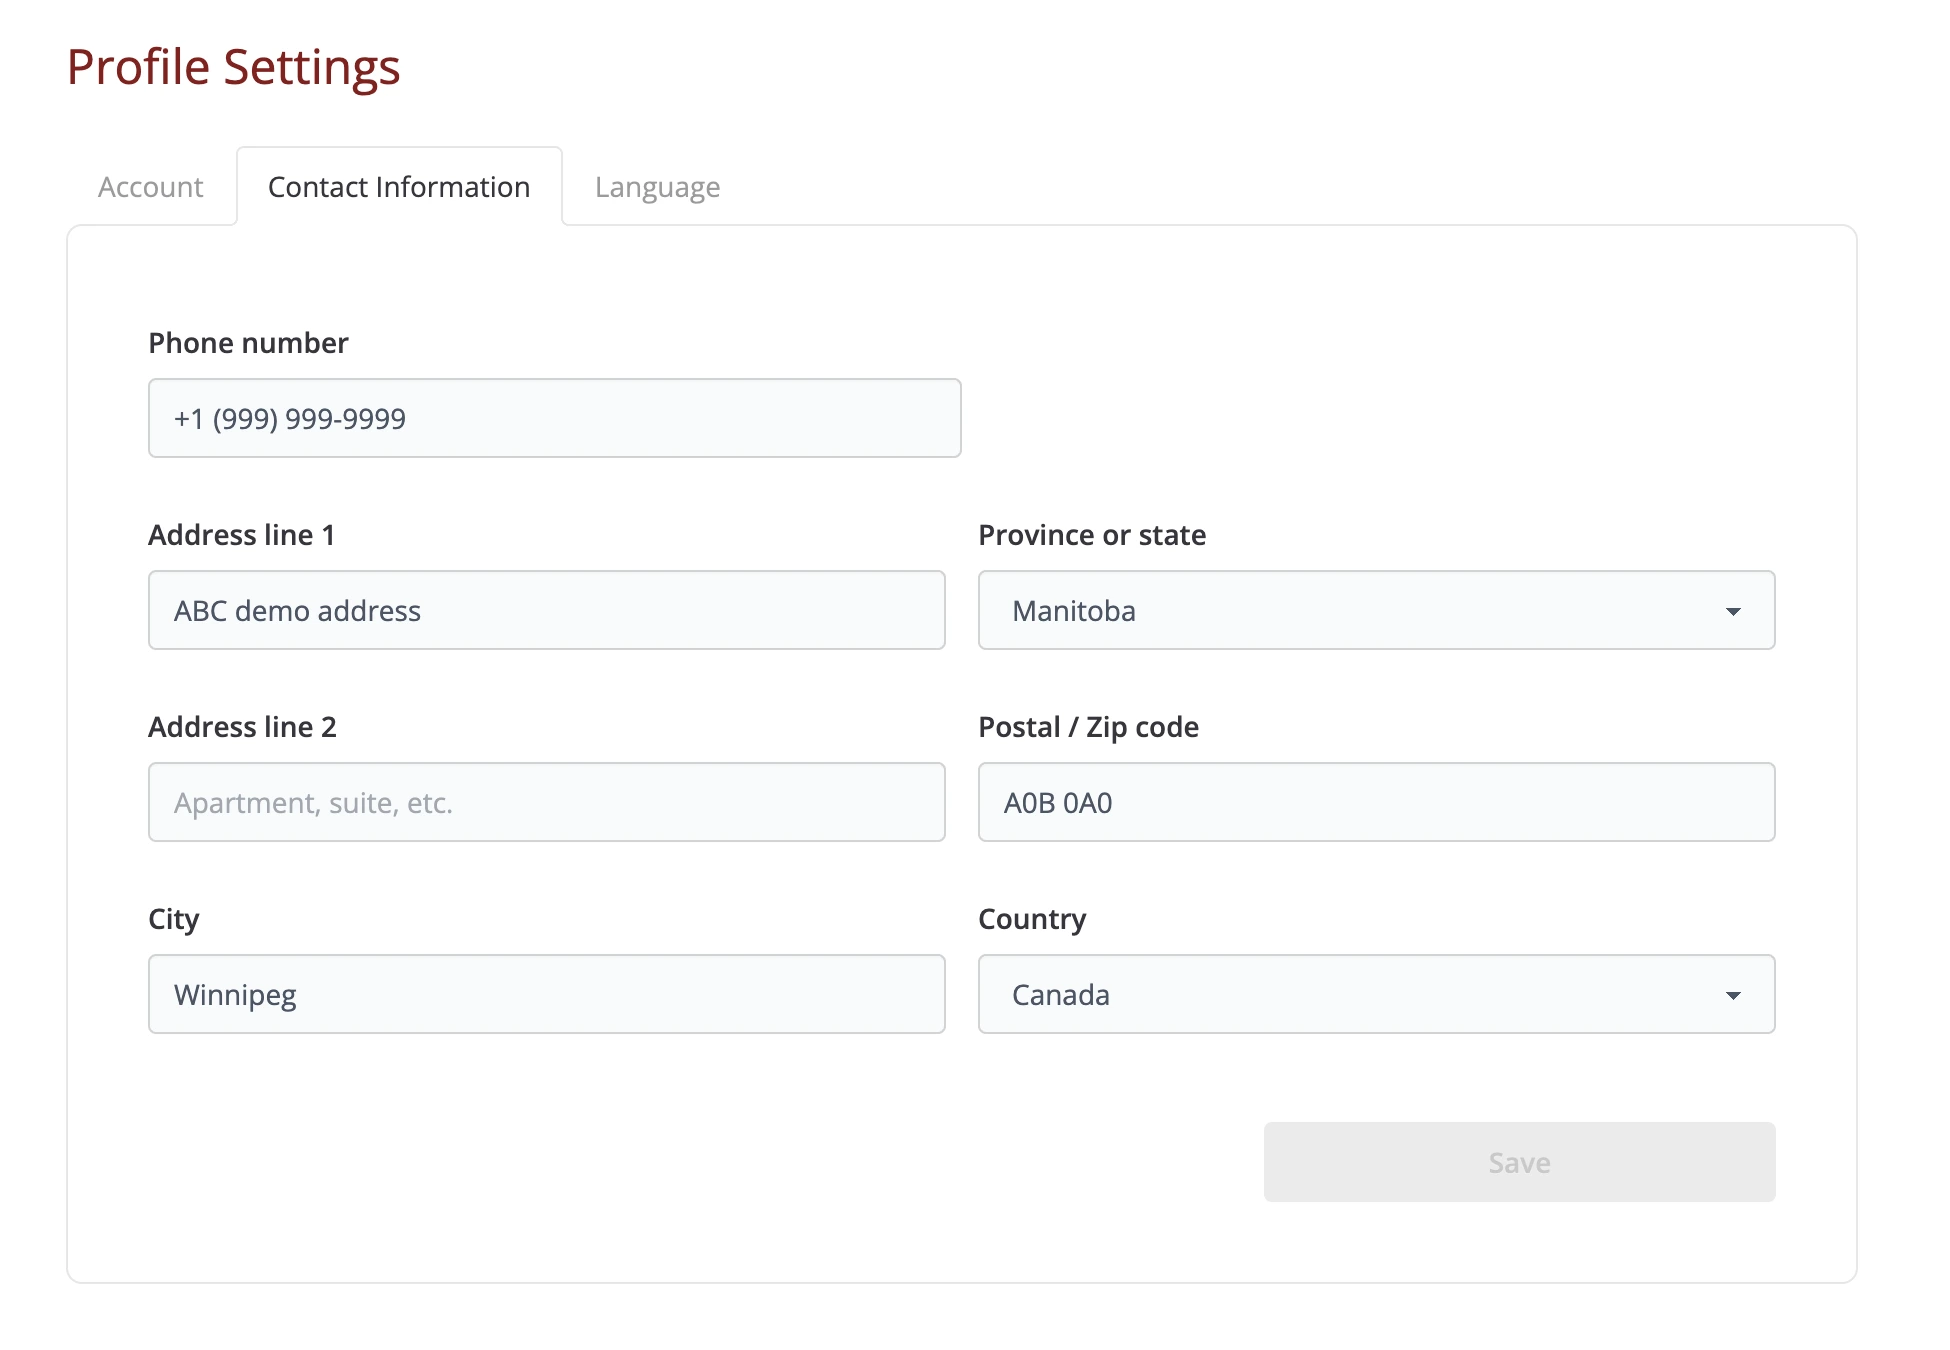
To save changes made to contact information, click on the “Save” button.
By completing this information once in your profile, these details will be automatically populated whenever you create a new submission in Step 2: Contact information of the Submission Form. This saves time for users who make multiple submissions, as they won’t need to re-enter their contact information for each submission.
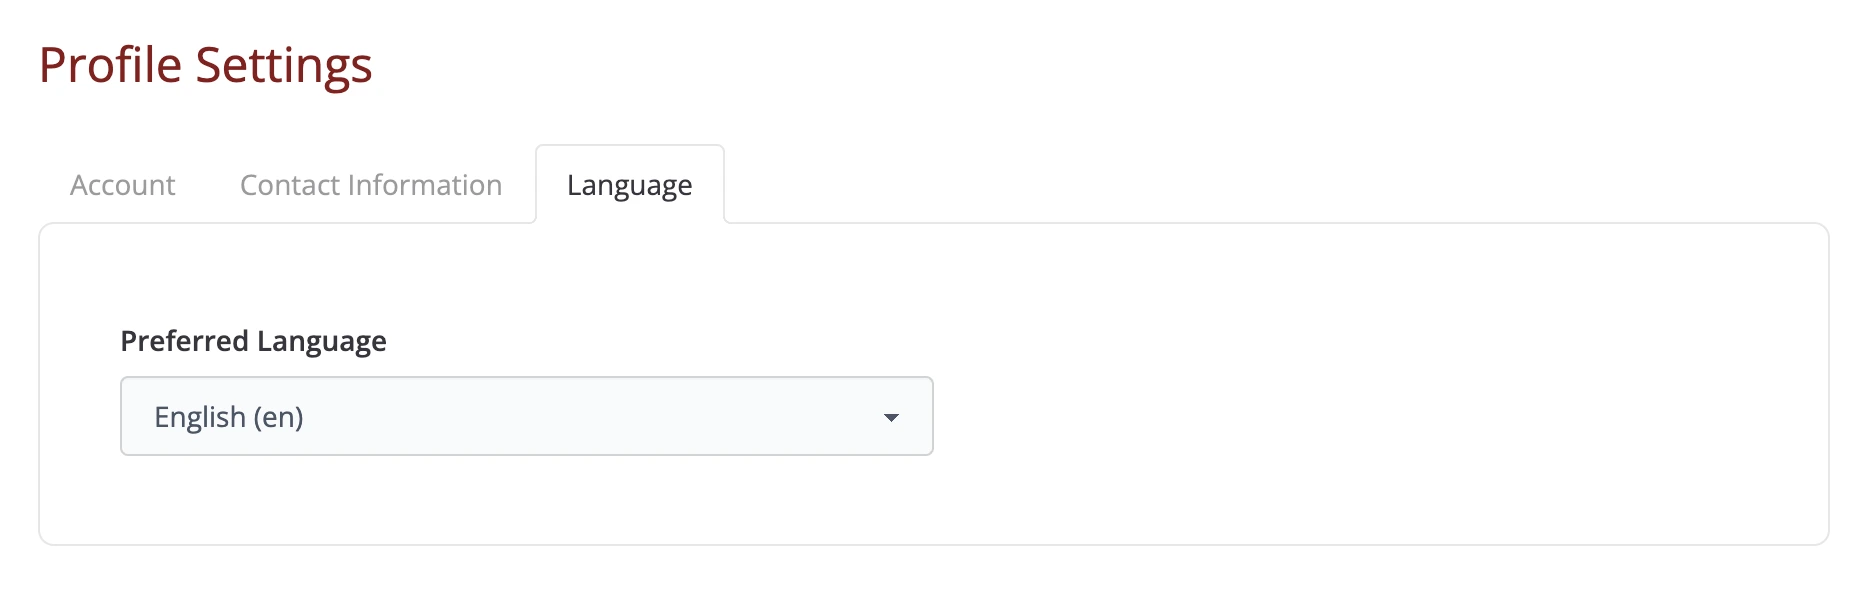
Language Tab
The Language tab allows users to change the language of the application. This is useful for users who are not comfortable with English, or who prefer to use a different language.
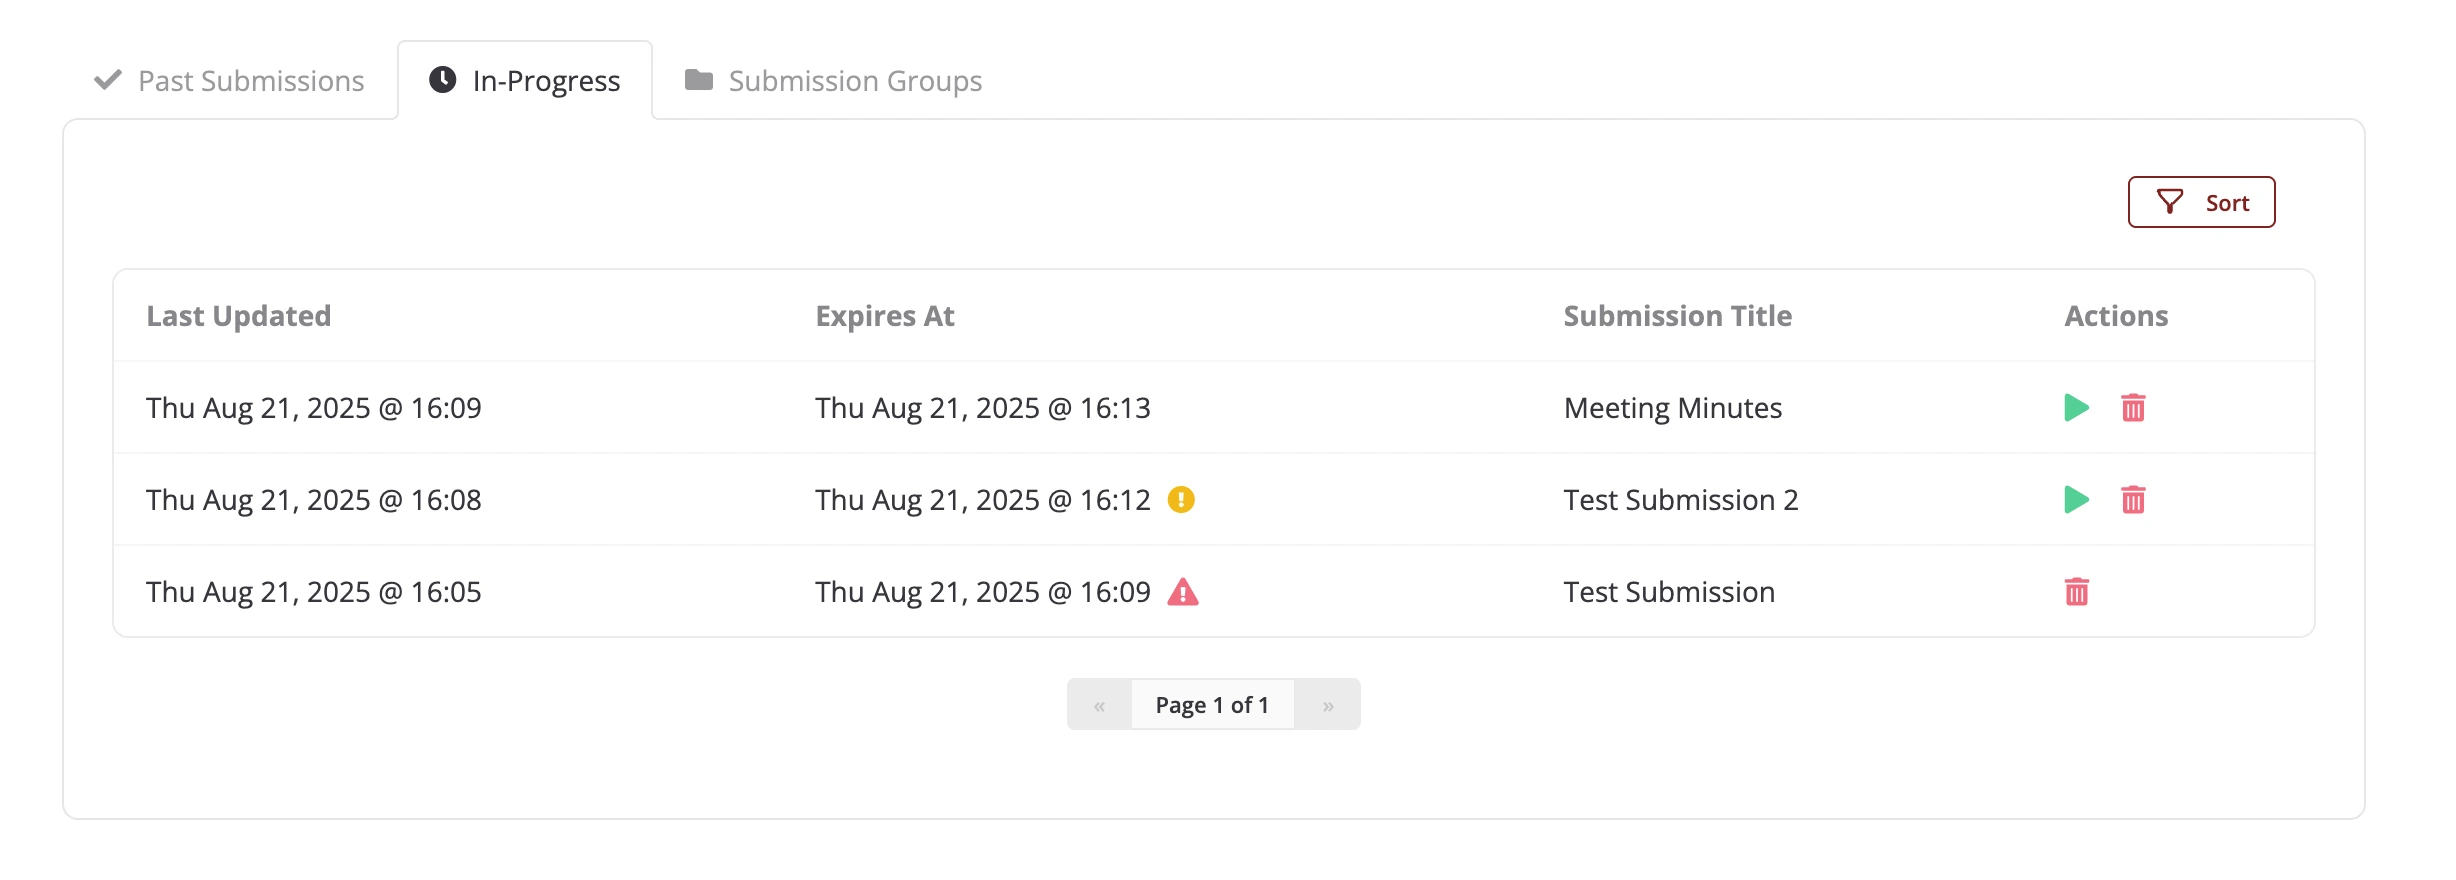
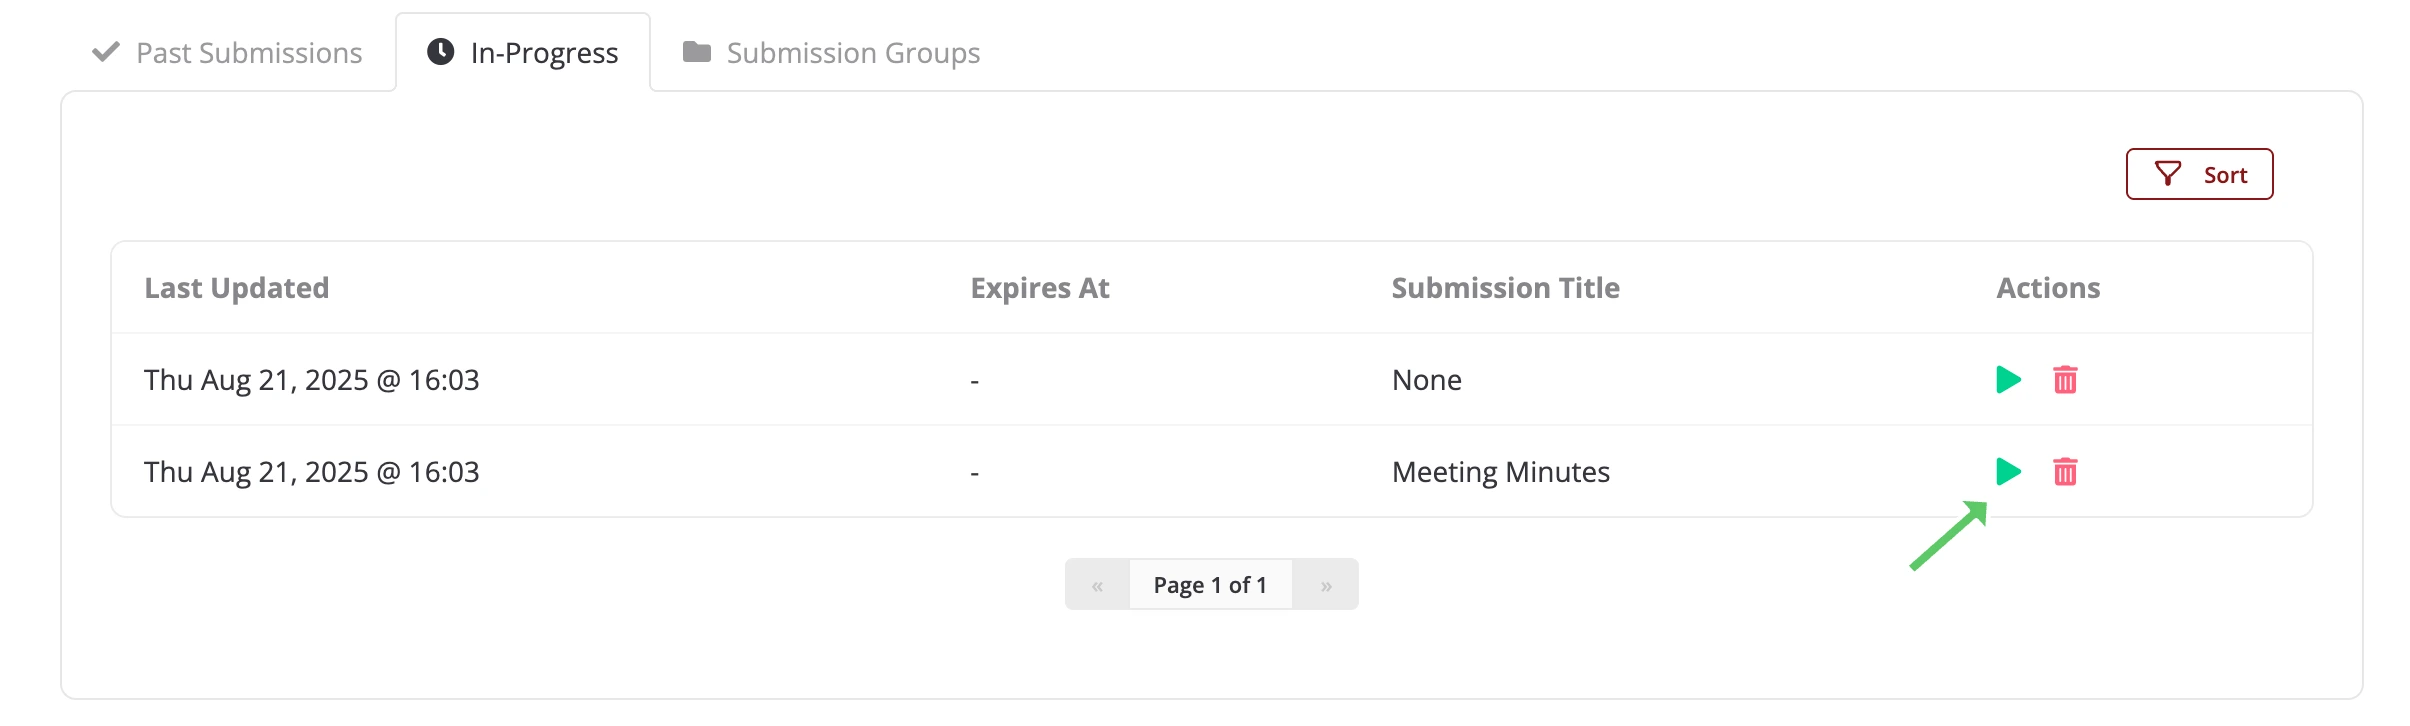
In-Progress Submissions
This section displays a table of all submissions that the user has started but not yet submitted.
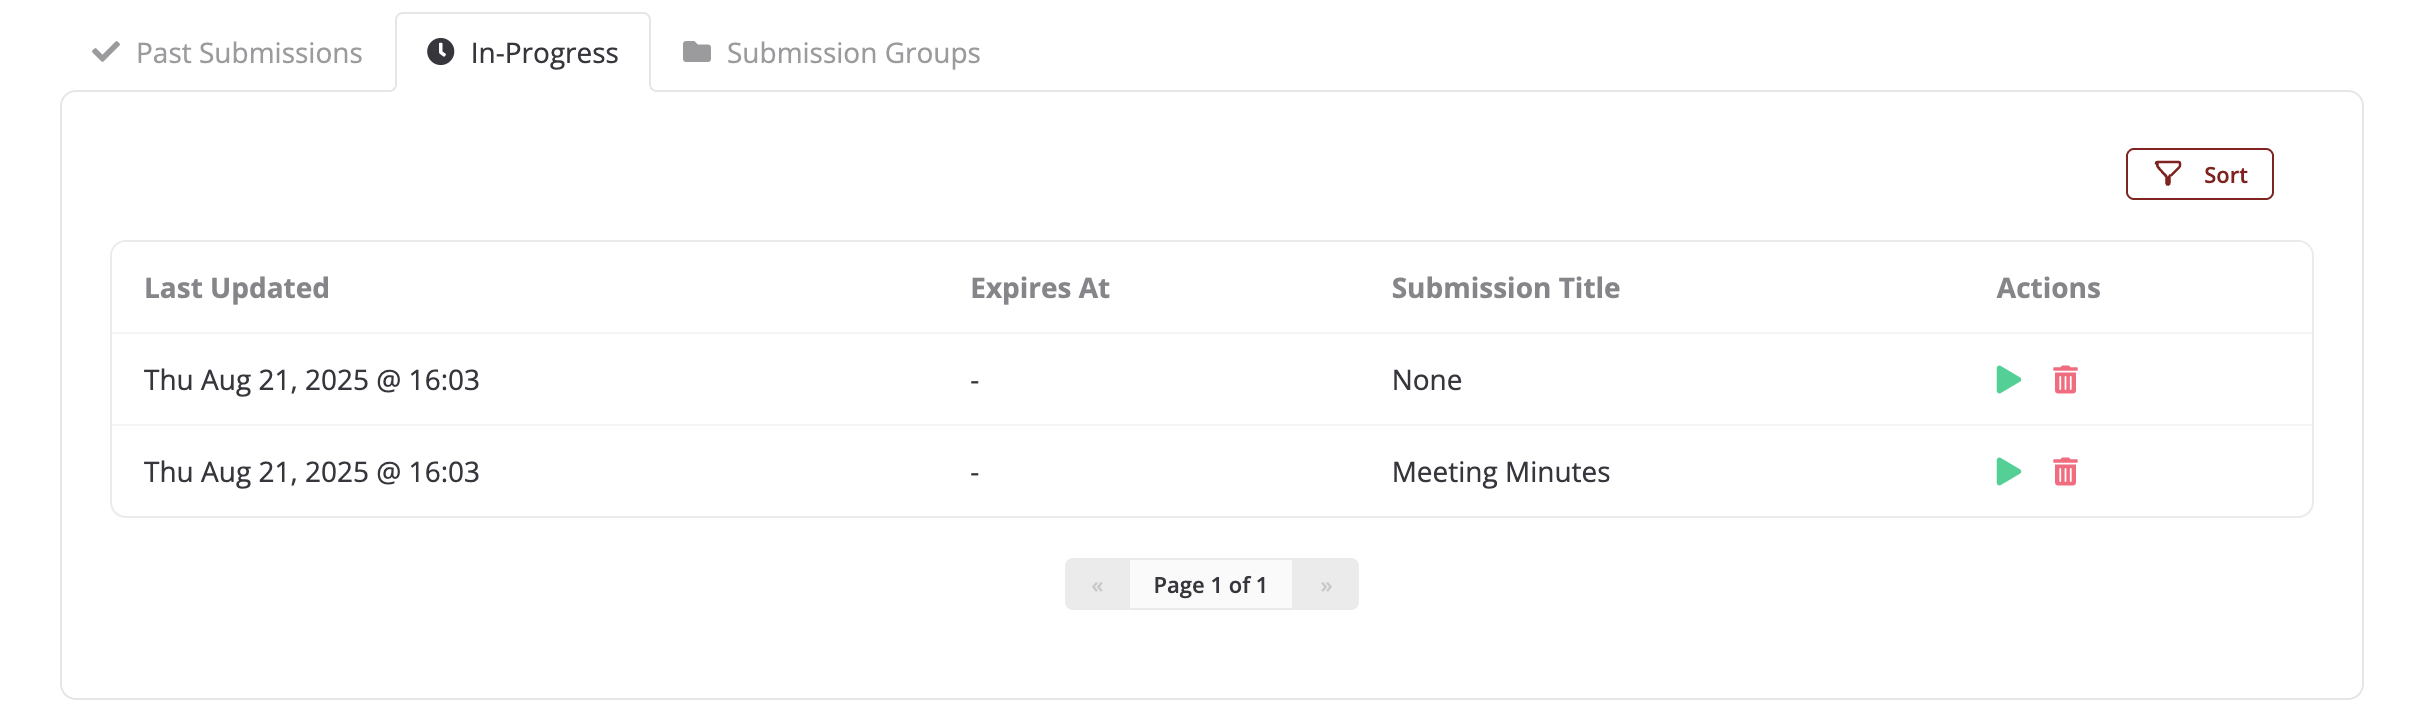
The “Submission Title” column displays the title provided by the user in the “Title” field of Step 4: Record Description of the Submission Form. If that field has not been filled out yet, the title will be “None”.
Expirable in-progress submissions will have an expiry date shown under the “Expires At” column. This is the date when the in-progress submission will expire if it is not submitted or updated. Expired in-progress submissions can no longer be resumed or submitted. In-progress submissions close to expiring will have their expiry date highlighted in red, whereas in-progress submissions that have already expired will have their expiry date both highlighted in red and striked through.
Note
Only in-progress submissions with uploaded files can expire.
The length of time before an in-progress submission expires can be configured in the settings. See UPLOAD_SESSION_EXPIRE_AFTER_INACTIVE_MINUTES and UPLOAD_SESSION_EXPIRED_CLEANUP_SCHEDULE for more information.
A reminder email will be sent to the user before the in-progress submission expires. The amount of time before the expiry date that the reminder email is sent can be configured in the settings. See UPLOAD_SESSION_EXPIRING_REMINDER_MINUTES and IN_PROGRESS_SUBMISSION_EXPIRING_EMAIL_SCHEDULE for more information.
Resuming an In-Progress Submission
Users can resume working on an in-progress submission by clicking on the green play icon for the relevant submission in the table. This will take them back to the submission form where they left off.
Once an in-progress submission is submitted, it will no longer appear in this table. Instead, it will be listed under the Past Submissions section.
Deleting an In-Progress Submission
Users can delete an in-progress submission if they no longer wish to complete it or if it has expired. To delete a submission, click the trash can icon on the relevant row of the table.
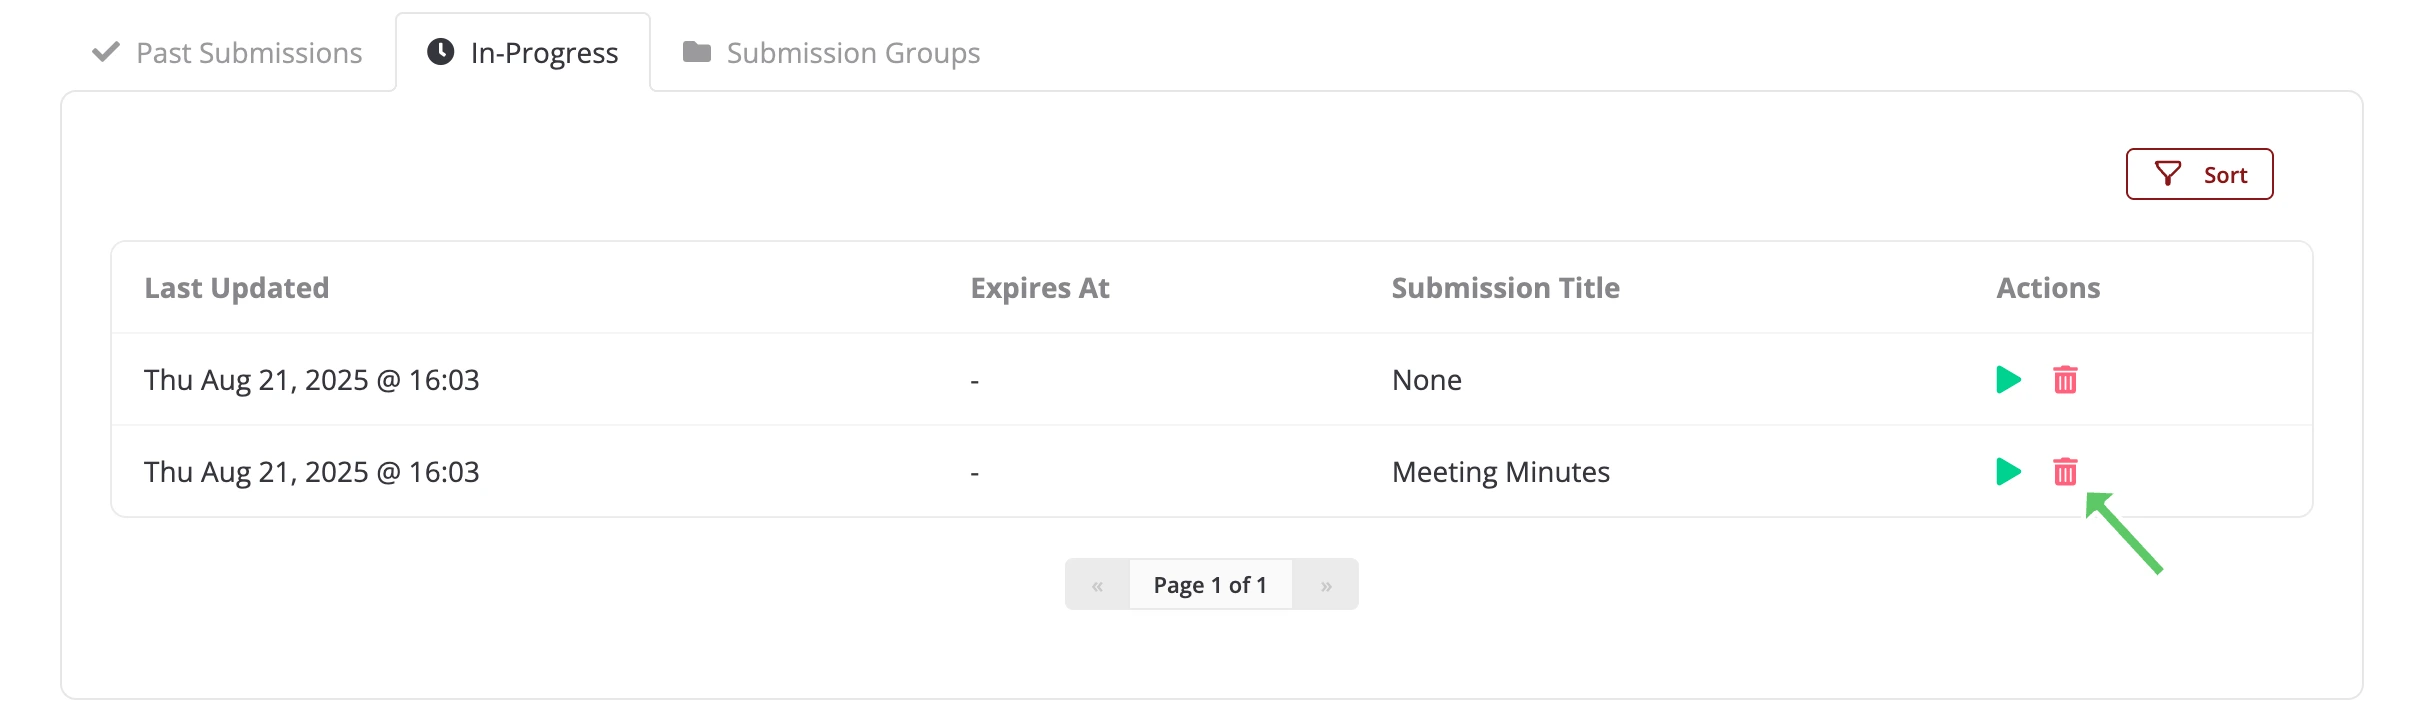
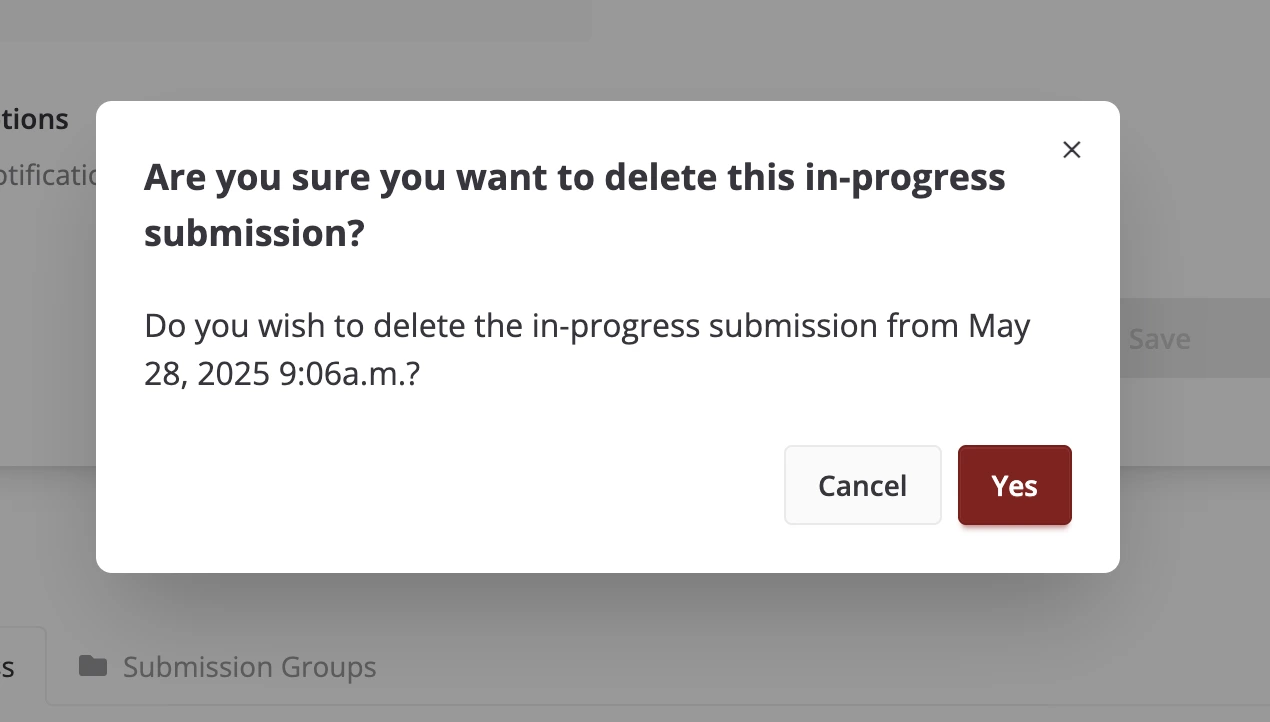
This will open a confirmation dialog where the user can confirm that they want to delete the in-progress submission. If ‘Yes’ is clicked, the in-progress submission and any uploaded files associated with it will be permanently removed from the system. Clicking on ‘Cancel’ will close the dialog and keep the user on the Profile page.
After deletion, the submission will no longer appear in the in-progress submissions table.
Past Submissions
This section displays a table of all submissions that the user has submitted in the past.
The user can view the details of a past submission by clicking on its file icon. This will open up the submission details page for that submission.
Alternatively, the user can download a CSV file of the submission by clicking its download icon.
Changing/Assigning Submission Group
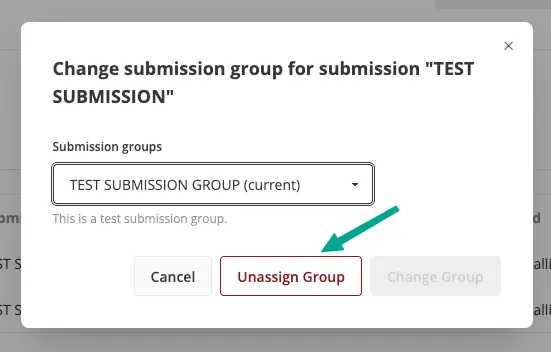
The user can also change the submission group of a past submission by clicking on the change/assign icon. For more information about submission groups, see Submission Groups.
This will open up a modal where the user can change the submission group of the past submission, or assign it to a group for the first time if it was not assigned to one when it was submitted.
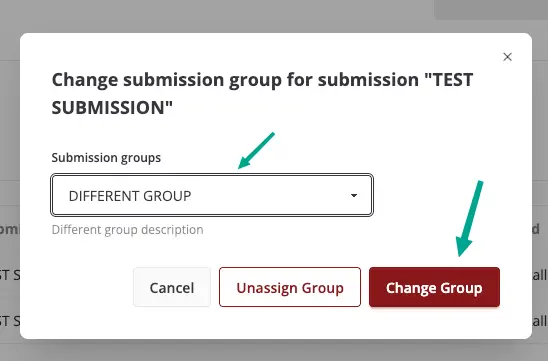
The user can also unassign the submission from its current group by clicking on the “Unassign Group” button. This will remove the submission from the group, but it will still remain in the user’s past submissions.
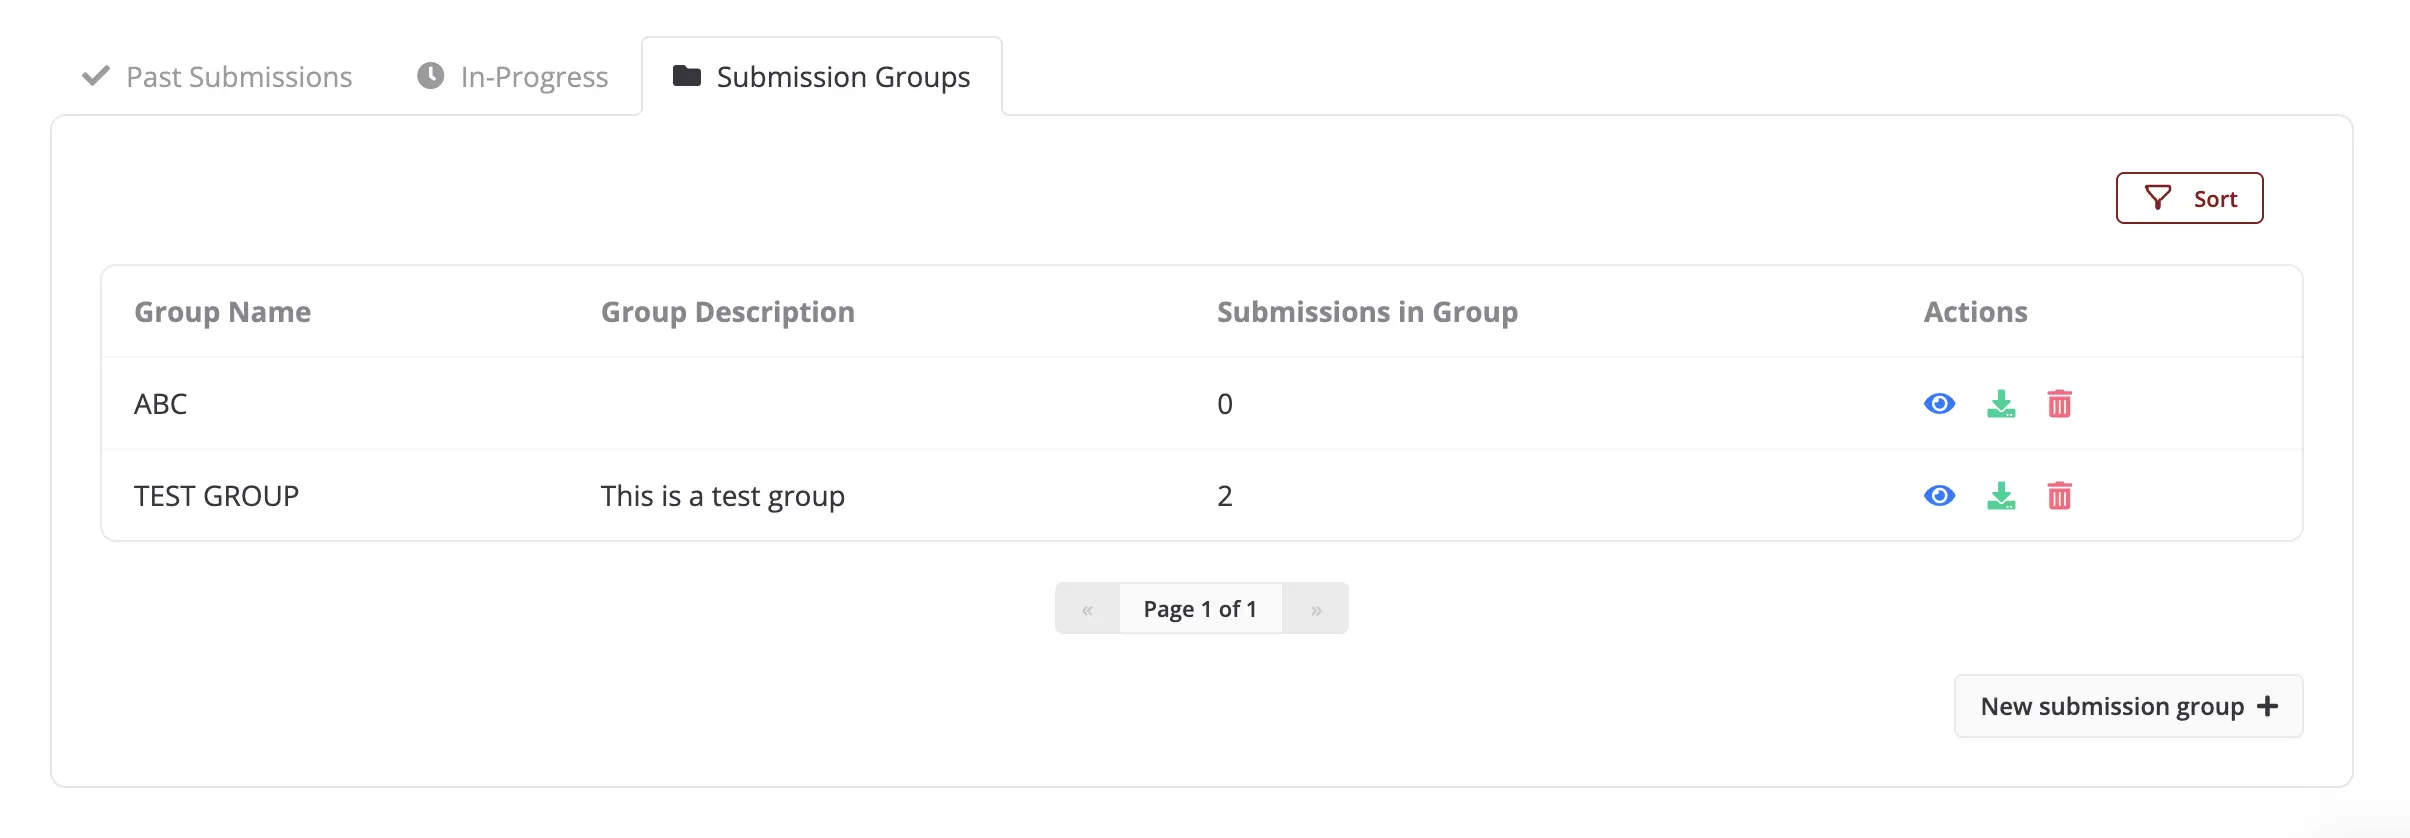
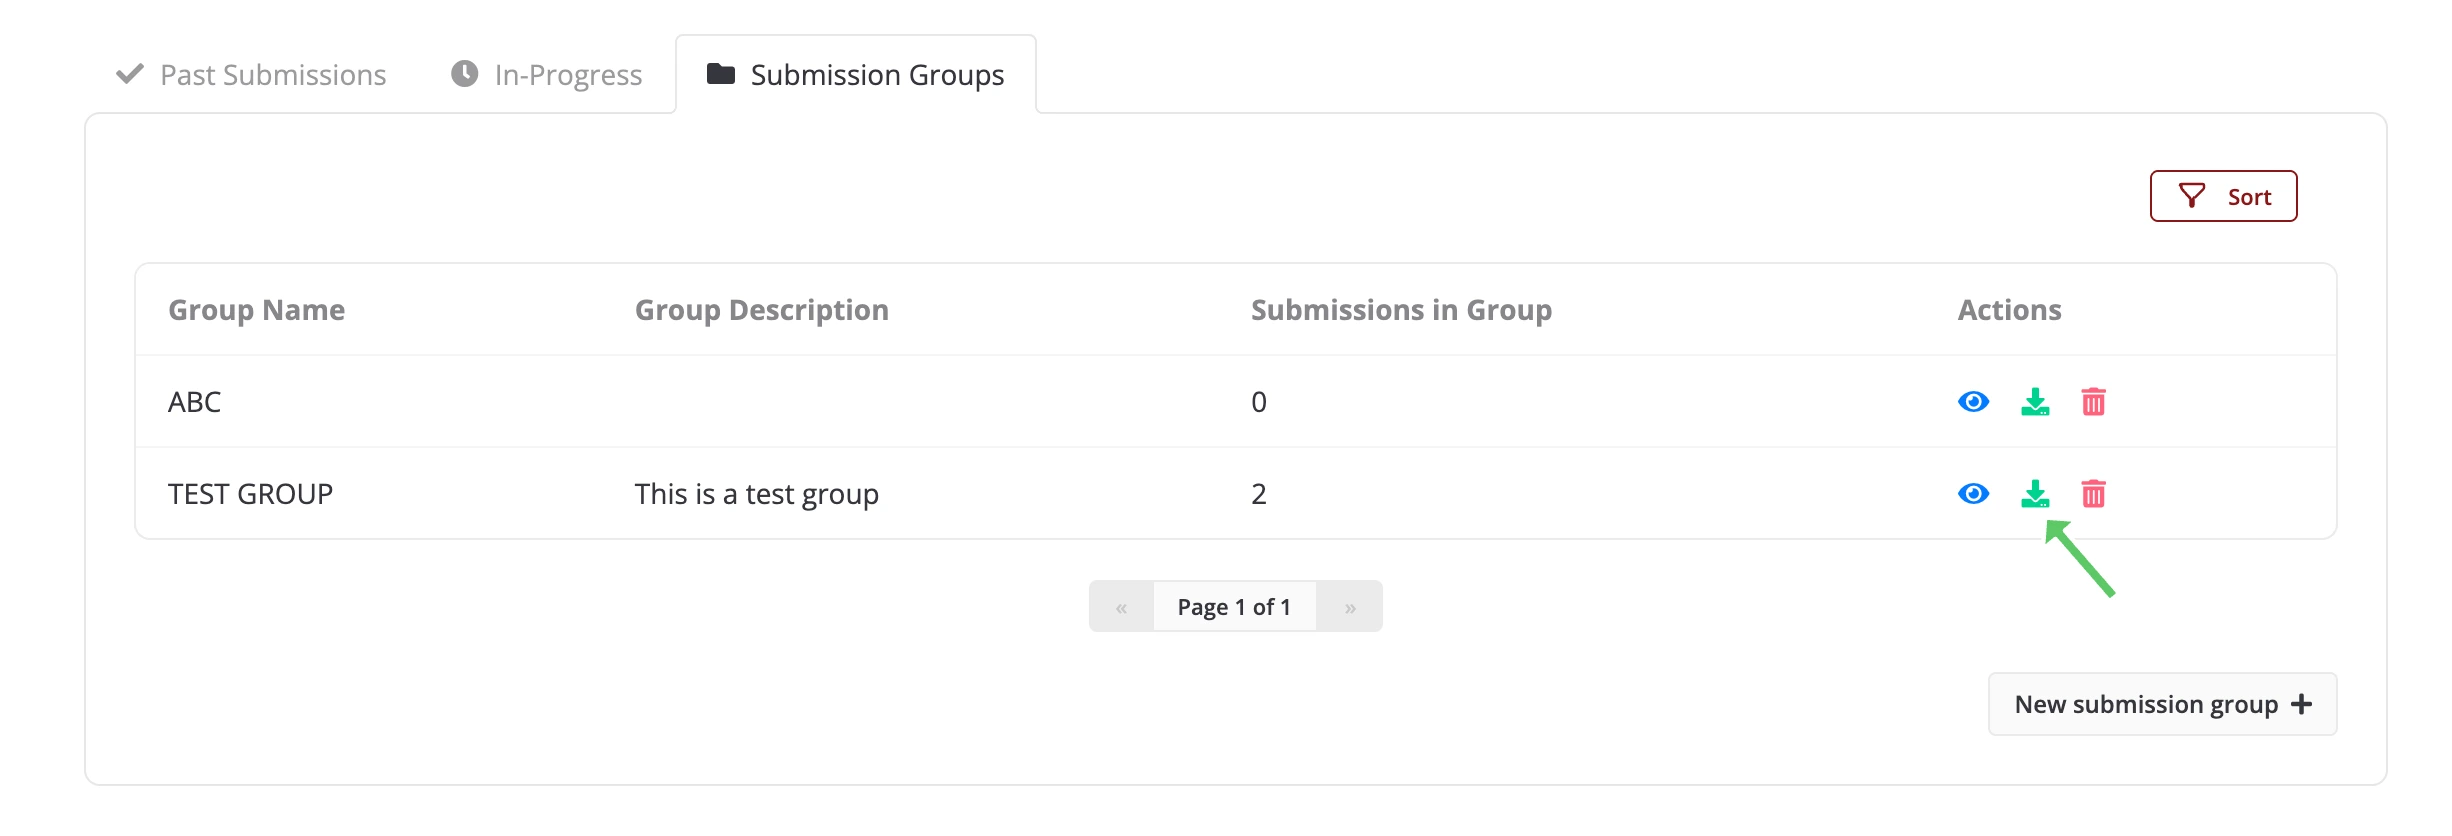
Submission Groups
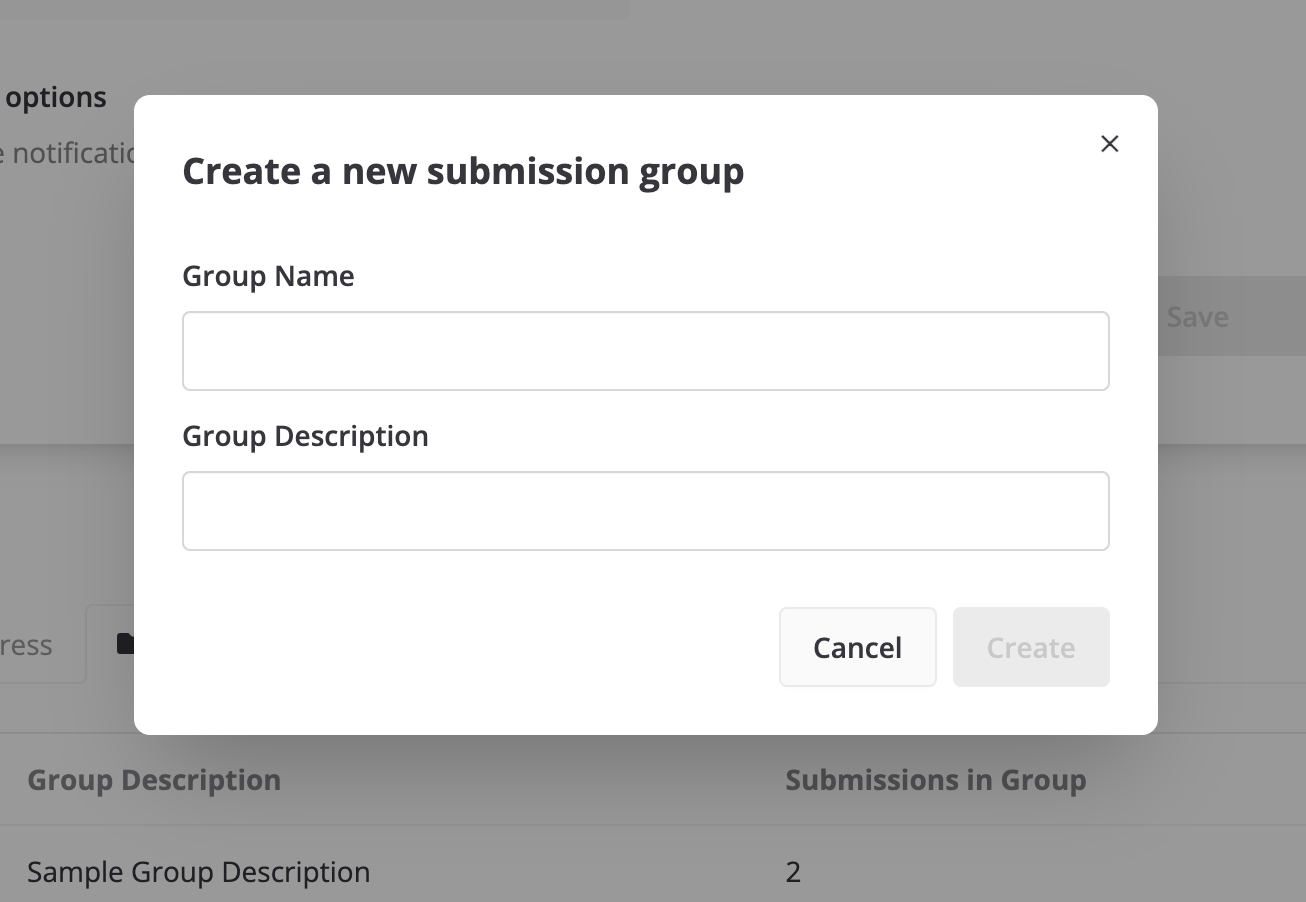
This section displays a table of all submission groups that the user has created. Submission groups that are made by the user during Step 7: Assign Submission to Group of the Submission Form will be listed here. A new submission group can also be created by clicking on “New submission group +” found below the table.
This takes the user to the submission group creation page where they can create a new submission group.
In the Submission Groups table on the Profile page, clicking on the download icon will export all submissions in that group as a CSV file for download.
The user can also view and modify the details of an existing submission group by clicking on the blue eye icon for that group in the table on the profile page.
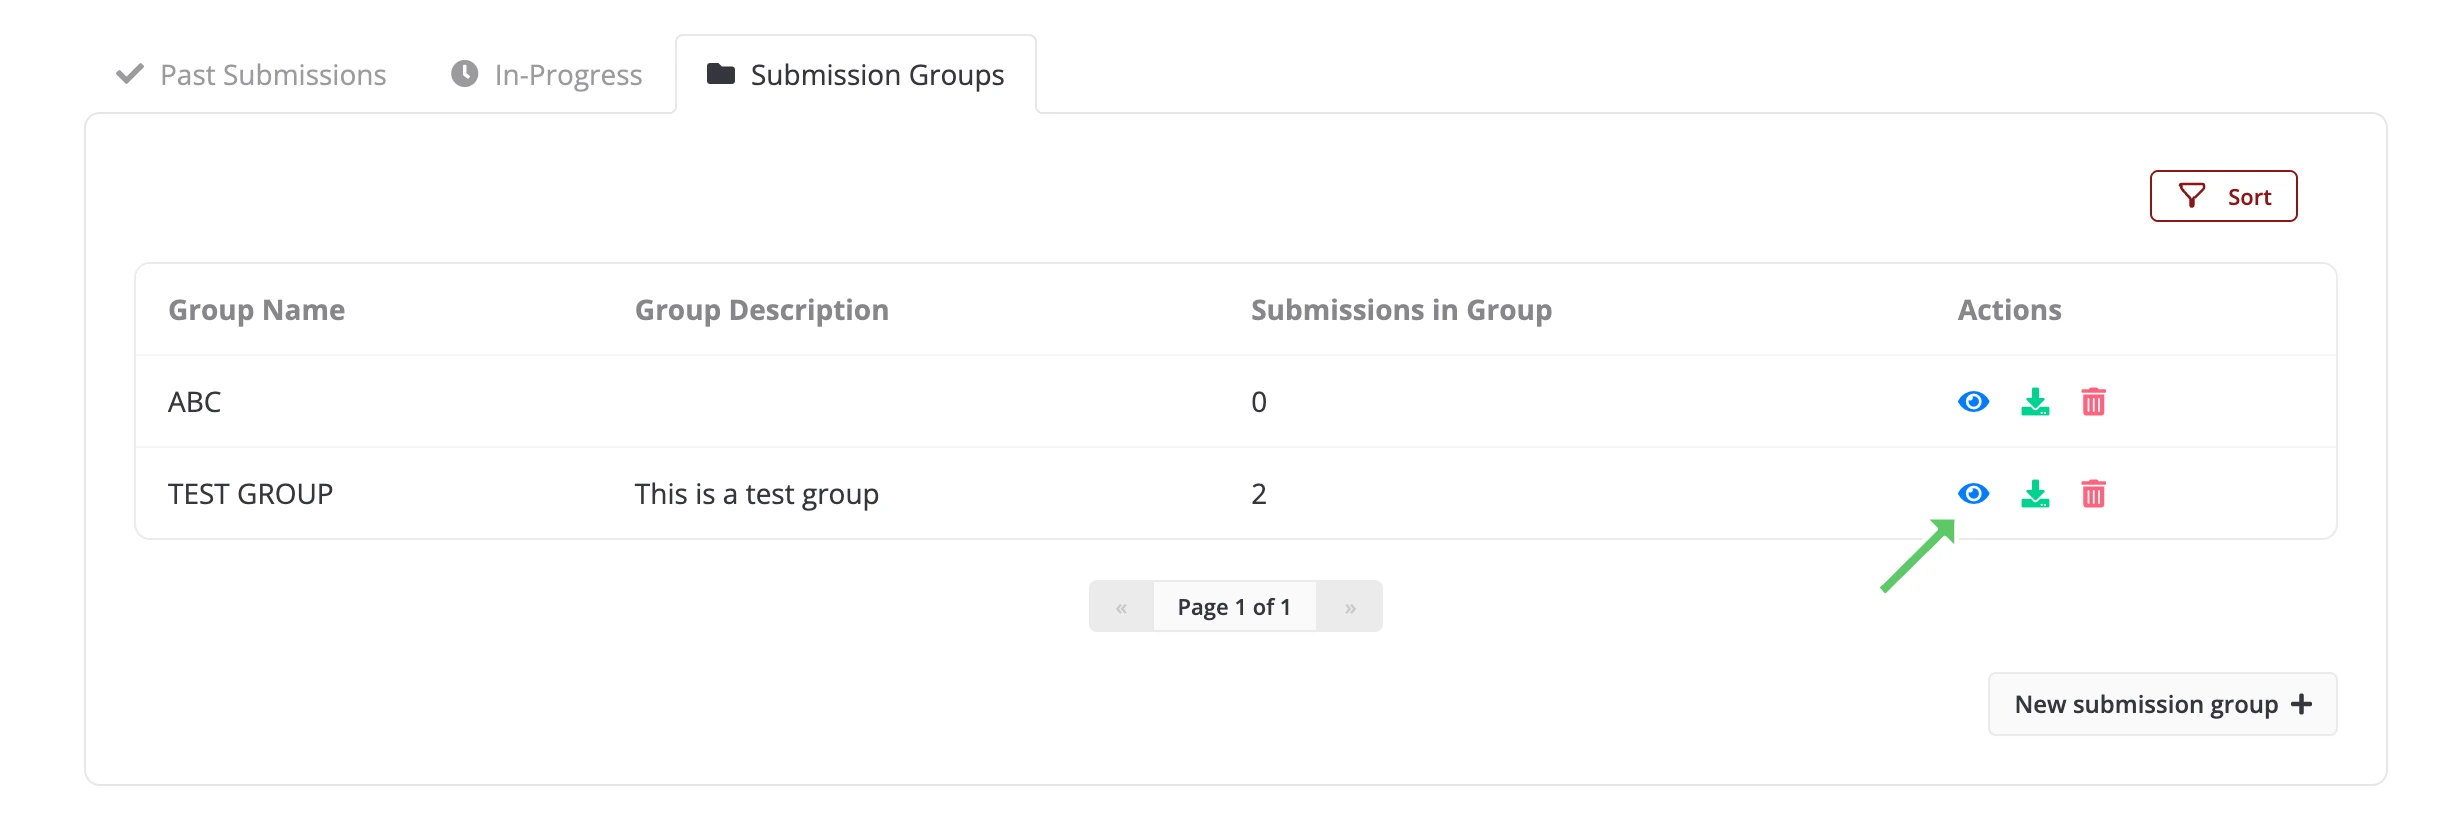
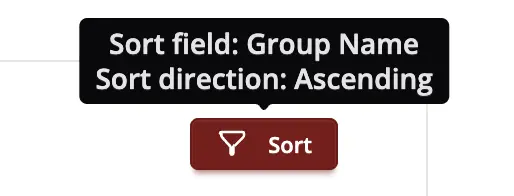
This will take the user to a page where they can modify the group name and group description, and also view past submissions made under this group. Users can also sort the submissions within the group using the same sorting functionality available on the main Profile page tables.
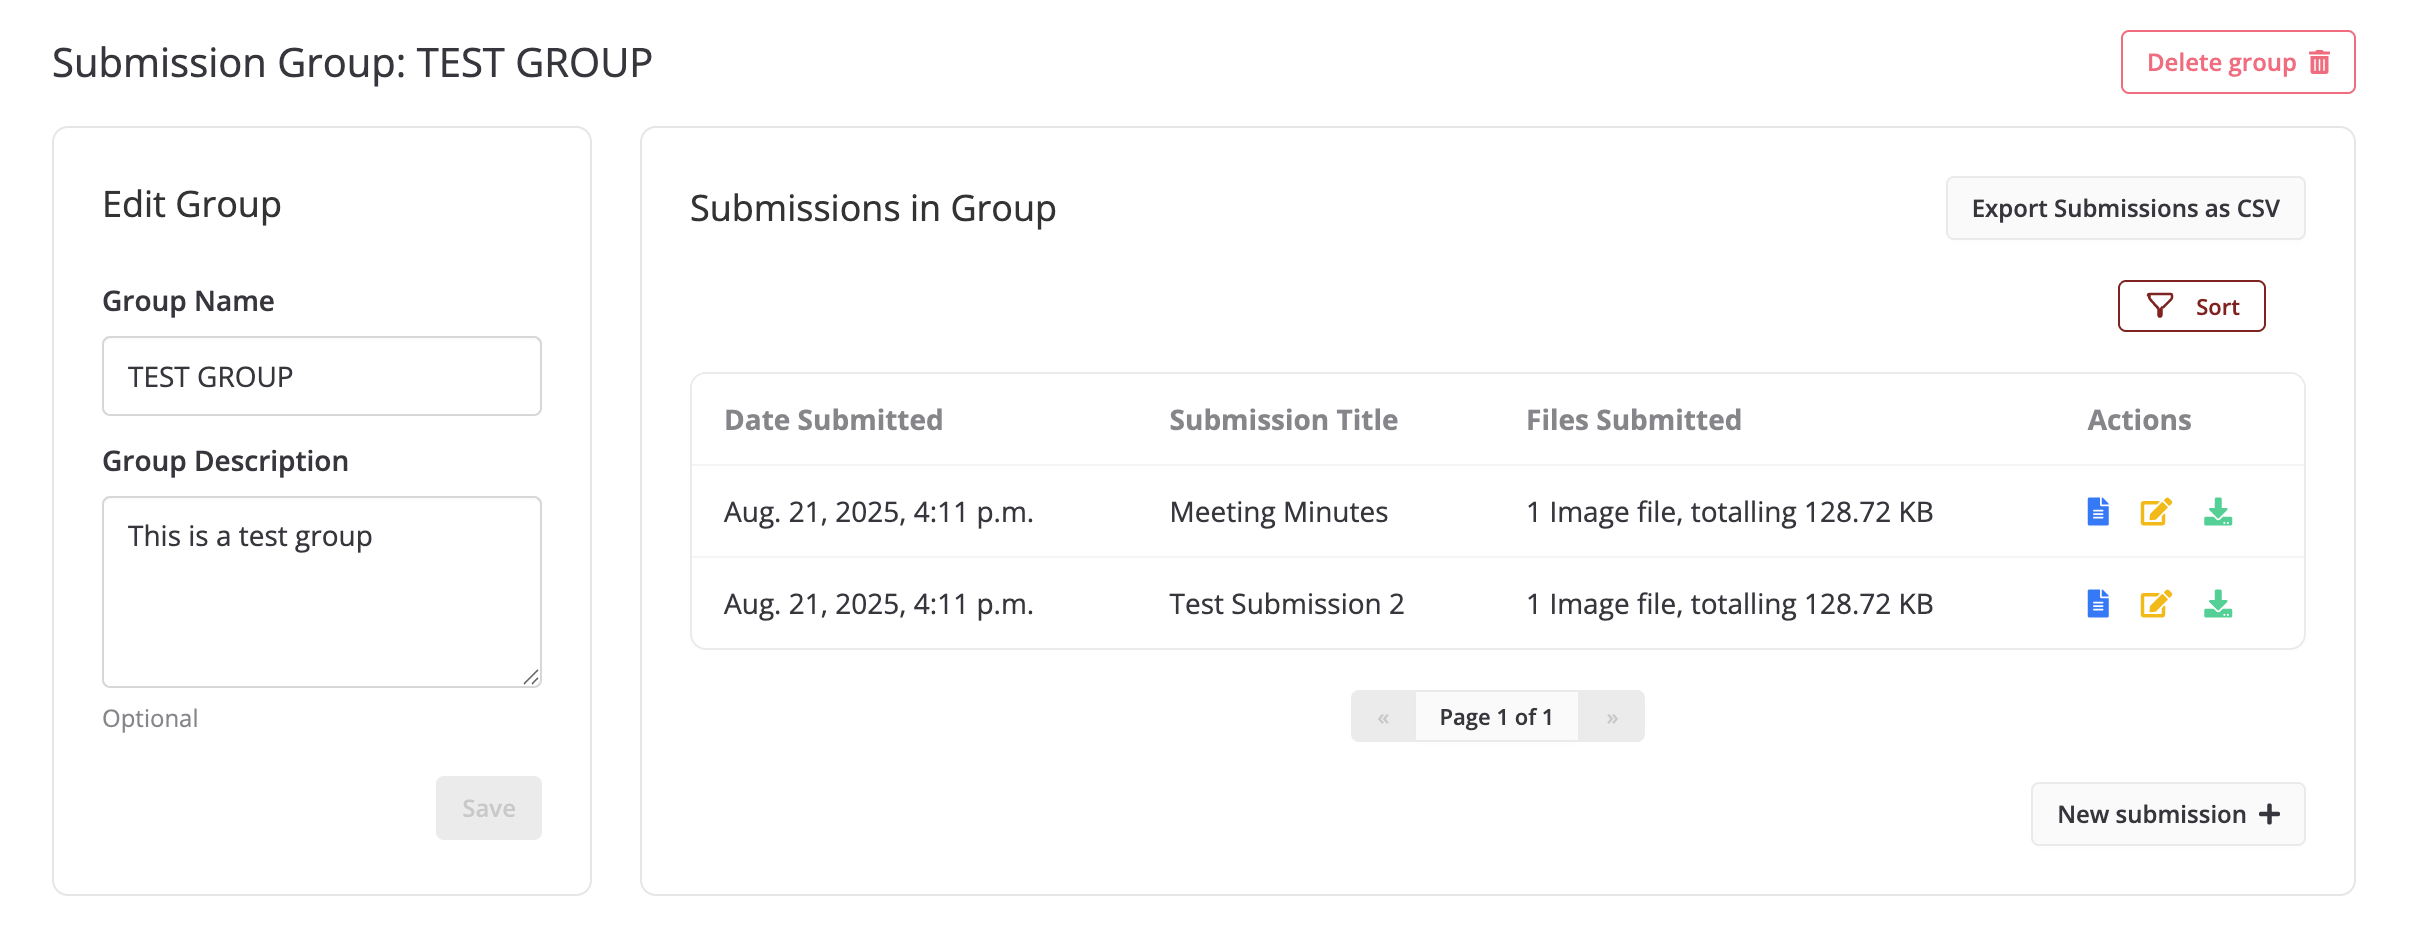
Clicking on “New submission +” takes the user to the Submission Form with the submission group pre-selected.
You can also click on the red trash icon to remove a submission group.
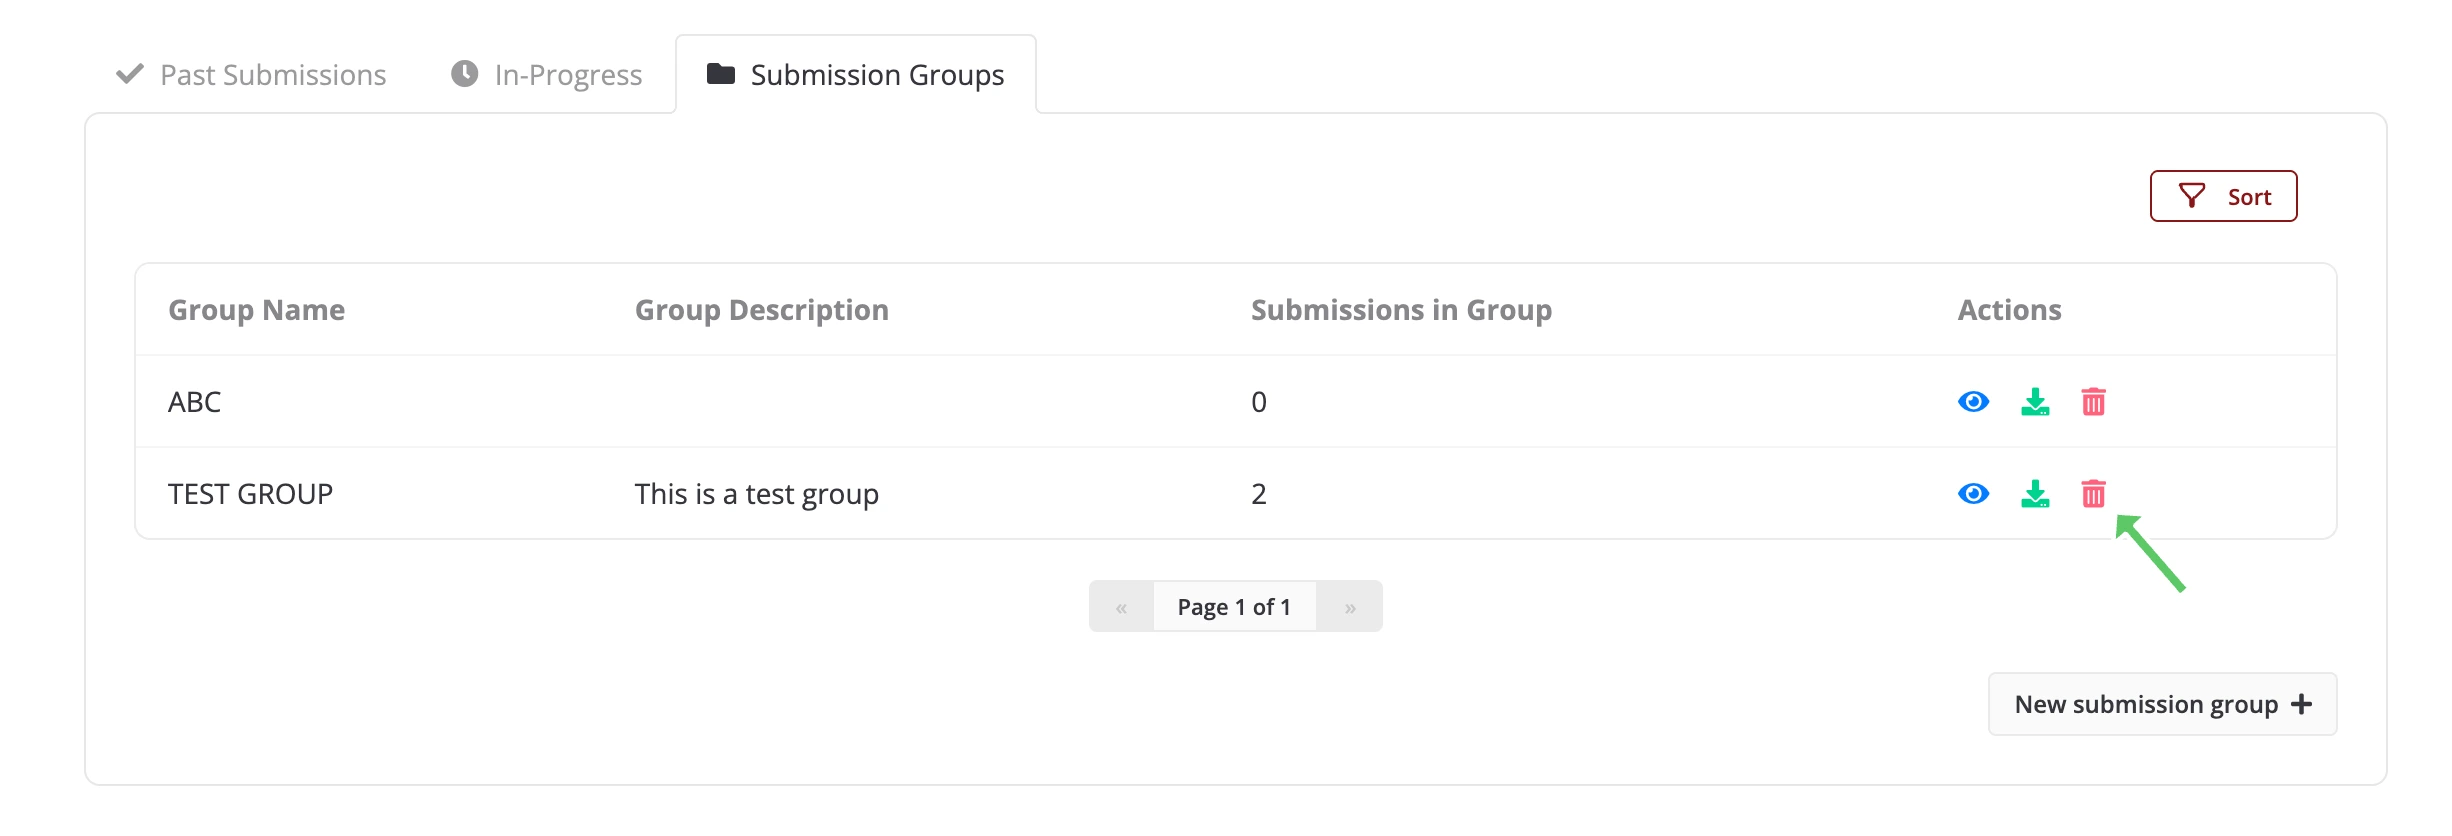
When you do this, a confirmation dialog box will appear asking if you are sure you want to delete the group.
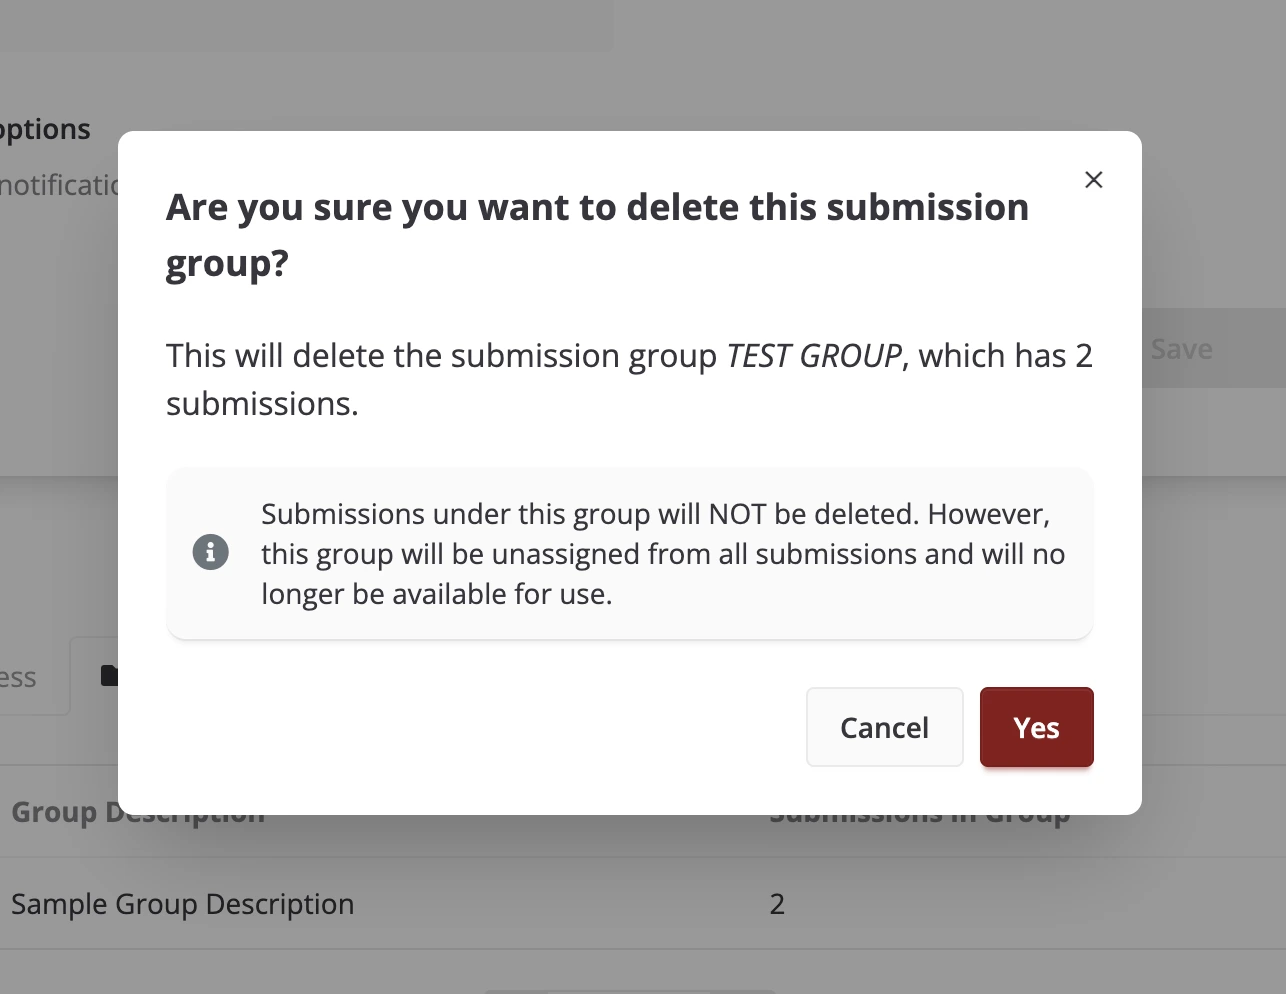
Click Yes to proceed with deleting the submission group. This will remove the group, but any submissions previously associated with it will remain intact, they will simply no longer be associated with any group.
Click Cancel if you do not wish to proceed with the deletion. This will close the dialog and return you to the profile page without making any changes.
Table Sorting Functionality
All tables on the Profile page (In-Progress Submissions, Past Submissions, and Submission Groups) include a Sort button located at the top right of each table. Users can click this button to sort the table data by different fields. When clicked, users can select which field to sort by and choose between ascending or descending order.
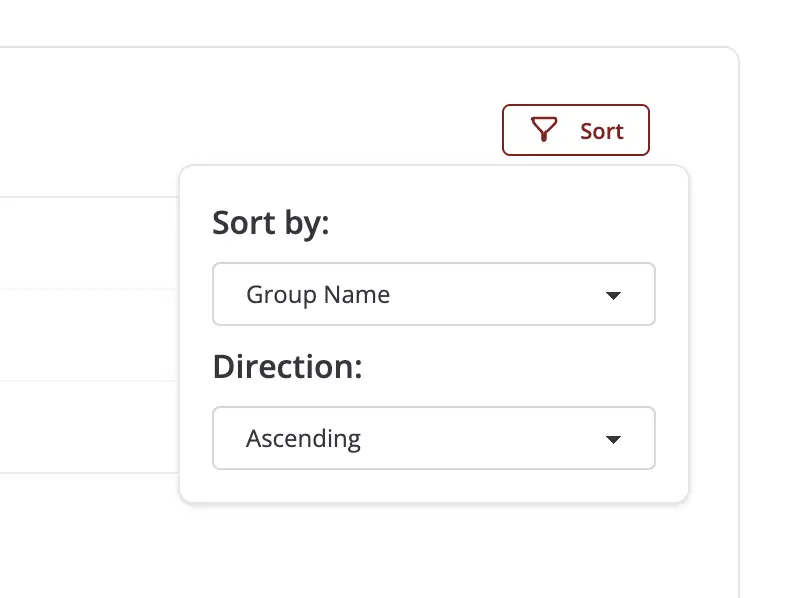
On hovering over the Sort button, it shows how the current table is sorted right now.