Running the App
It is recommended to run this application with Podman (or alternately Docker). The following documentation assumes you are using Podman, but if you are using Docker, substitute the relevant Docker commands.
Before running the application, make sure you have these tools installed:
Podman Desktop (Optional, but recommended)
Development Application
The simplest way to run the application is in “development” mode. If you just want to try the application out, follow these steps.
From the root of the repository, run the following commands before running the application for the first time.
cp example.dev.env .dev.env
To start up the application, run this command:
podman-compose -f compose.dev.yml up -d
To stop the application, run the down command:
podman-compose -f compose.dev.yml down
Visit http://localhost:8000 to see the application running.
If you are using Podman Desktop, you should now see the application and all of its services running there, too.
You will find that you cannot log in to the application. You can create a new administrator user by running the following command.
podman-compose -f compose.dev.yml exec app python manage.py createsuperuser
The development application uses a simple Mailpit server to intercept messages coming from the application. Visiting http://localhost:8025 when the app is running allows you to visit the Mailpit dashboard, which lets you view all of the emails sent by the app.
If you would like to create new users via the sign-up page, you can find the account activation emails in Mailpit.
Finding Logs in the Development Application
The logging configuration for the application can be found in the file
app/settings/docker_dev.py. The logs are all written to stdout, which is
captured by Podman (or Docker).
To view logs for a given container (the app container, in this case), you may run a command like this:
podman-compose -f compose.dev.yml logs -f app
The logs can also be found easily in Podman Desktop by clicking on a specific container.
Debugging the Development Application
To debug the application, view the setup in the DEVELOPERS.md file.
Production Application
The production Docker environment uses Nginx + Gunicorn instead of the Django development server, and opts to use MySQL instead of SQLite.
From the root of the repository, run the following commands before running the application in “production mode” for the first time.
cp example.prod.env .prod.env
The settings in the .prod.env file control the application, as well as some other settings
Django loads. Refer to Application Settings for application
settings, and refer to the file app/settings/docker_prod.py for more
settings that can be controlled by the .prod.env file. The example.prod.env file
contains most of the settings you are likely to be interested in changing.
Similar to the development application, you run the production application using Docker or Podman, but pass it the production compose file instead.
podman-compose -f compose.prod.yml up -d
After starting the application up, you will need to update the database, and you will need to collect static files. Collecting static files is not necessary when using the Django development server, but it is necessary when using Nginx + Gunicorn in the prod environment.
podman-compose -f compose.prod.yml exec app python manage.py migrate --noinput
podman-compose -f compose.prod.yml exec app python manage.py collectstatic --noinput
To create an admin superuser, you can run the following command, and follow the prompts.
podman-compose -f compose.prod.yml exec app python manage.py createsuperuser
Admin Set-up with Django Admin
Once you have the application running, you’ll need to log in as the superuser you created, and set the name of the site and the domain in the database. You can either do this with the command line or with the Django admin.
To set the name and domain using the Django admin, log in to http://yourdomain.com/admin/, substituting yourdomain.com for the domain the app is being hosted at.
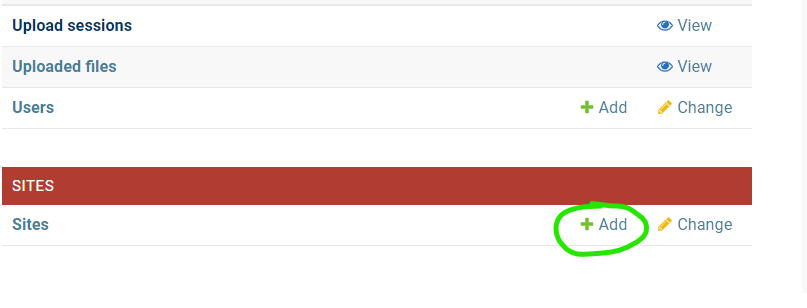
Once logged in, click + Add under the Sites section to add your site:
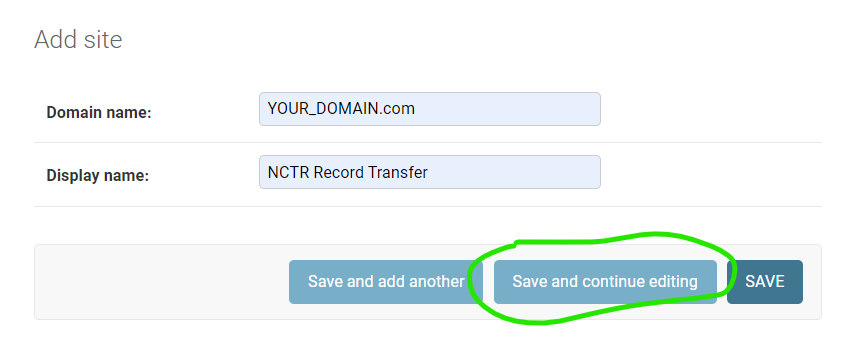
Fill out your domain name, and give the website a name (you can change the name later if you don’t like it). Once filled out, click the blue Save and continue button.
Once saved, take a look at the address in the address bar for your new site. You will see something like YOUR_DOMAIN.com/admin/sites/site/2/change. The important part to note is the number - this number is the SITE_ID.
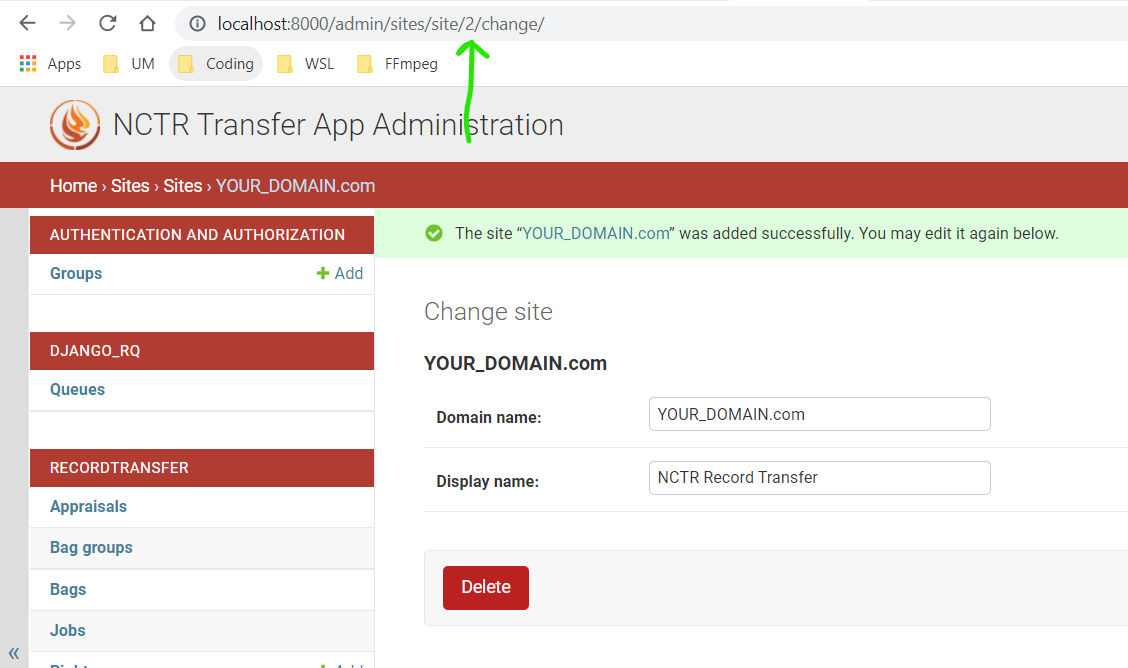
If the number you see is not 1, you will have to edit the environment variables file and change
SITE_ID to the correct number. If the number you see is 3, for example, you will make the
following change in the .prod.env file:
# file .prod.env
SITE_ID=3
Admin Set-up with Django Command Line
If you’re more comfortable using the command line, you can also update the site name and domain using a terminal. Open a shell in the app container using the following command:
podman-compose -f compose.prod.yml exec app python manage.py shell
Your terminal will change to a Python shell with this command. Input the following lines of Python to create a new site.
>>> from django.contrib.sites.models import Site
>>> site = Site(domain='YOUR_DOMAIN.com', name='NCTR Record Transfer')
>>> site.save()
>>> print(site.id)
2
>>> exit()
Note that the ID is shown after you input print(site.id). If the number you see is not
1, you will have to edit the environment variables file and change SITE_ID to the correct
number. If the number you see is 3, for example, you will make the following change in the
.prod.env file:
# file .prod.env
SITE_ID=3
Nginx Configuration
The Nginx configuration file can be found in docker/nginx/nginx.conf. The Dockerfile that
builds Nginx can also be found in that folder.
MySQL Configuration
The MySQL configuration file can be found in docker/mysql/mysqld.cnf.
Redis Configuration
The Redis configuration file can be found in docker/redis/redis.conf.
ClamAV Configuration
The ClamAV configuration files can be found in the folder docker/clamav