Adding Sites
If you are running the record transfer app somewhere other than your localhost, you will need to add your site’s domain to the database. If you do not set the domain, your emails will not send correctly, and will have the wrong link to your site.
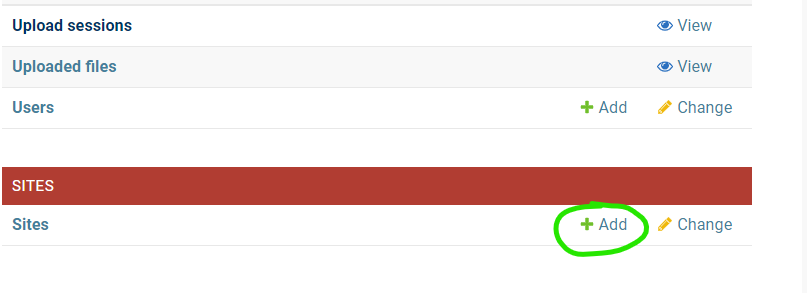
To set the name and domain of your site, first log in as a superuser. Regular staff users do not have permission to modify Sites.
Go to the administrator application (accessible at /admin/), and click on + Add next to Sites.
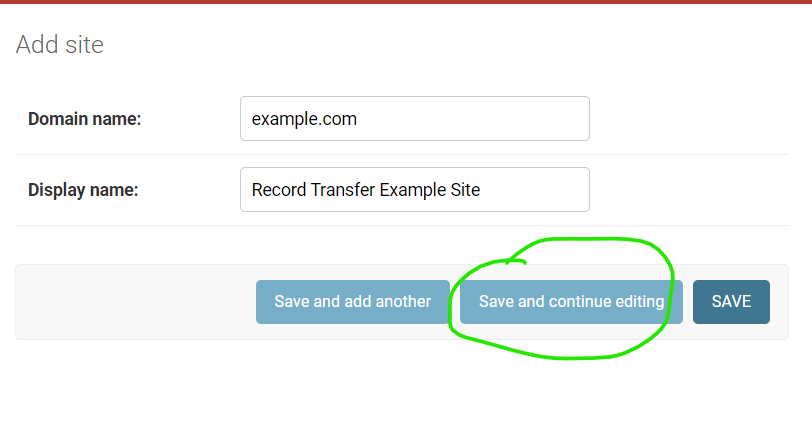
Fill out your domain name, and give the website a name (you can change the name later if you don’t like it). Once filled out, click the blue Save and continue button.
Once saved, take a look at the address in the address bar for your new site. You will see something like /admin/sites/site/2/change. The important part to note is the number. This number is the SITE_ID.
To change which site the app uses, you need to change the SITE_ID Django setting. This setting
is controlled by the environment variable file. If running in development, this file is
.dev.env and if running in production, this file is .prod.env.
If you want to change to Site 3, the SITE_ID should be set like this:
# file .dev.env OR .prod.env
SITE_ID=3